158 29
A contact form on the website allows visitors to communicate with the site owner by sending direct messages. In HelpDesk, you can add a contact form as another ticket source on your website.
Creating a contact form is available in every HelpDesk plan.
Are you a WordPress user? Try the dedicated HelpDesk plugin that easily turns every message from your visitors into a fully manageable ticket. Get the HelpDesk plugin for WordPress.
How to create a contact form
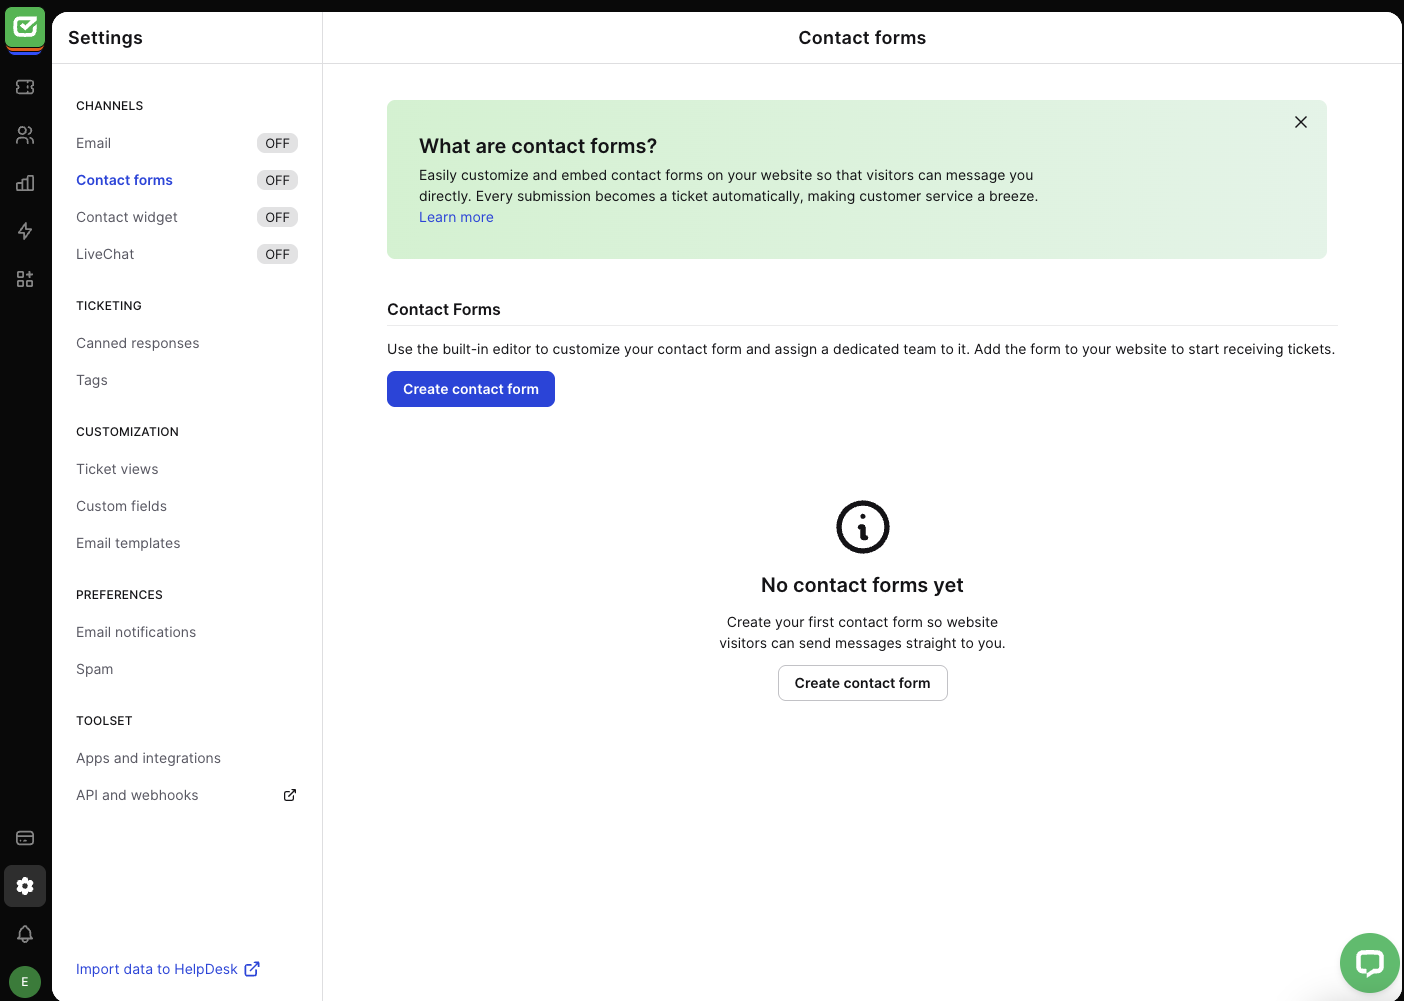
If you want to create and add your contact form, go to the “Settings” section and choose the “Contact forms” category.

In the “Contact forms” settings category, select the “Create contact form” button to create the form and then fully customize its details or assigned team.
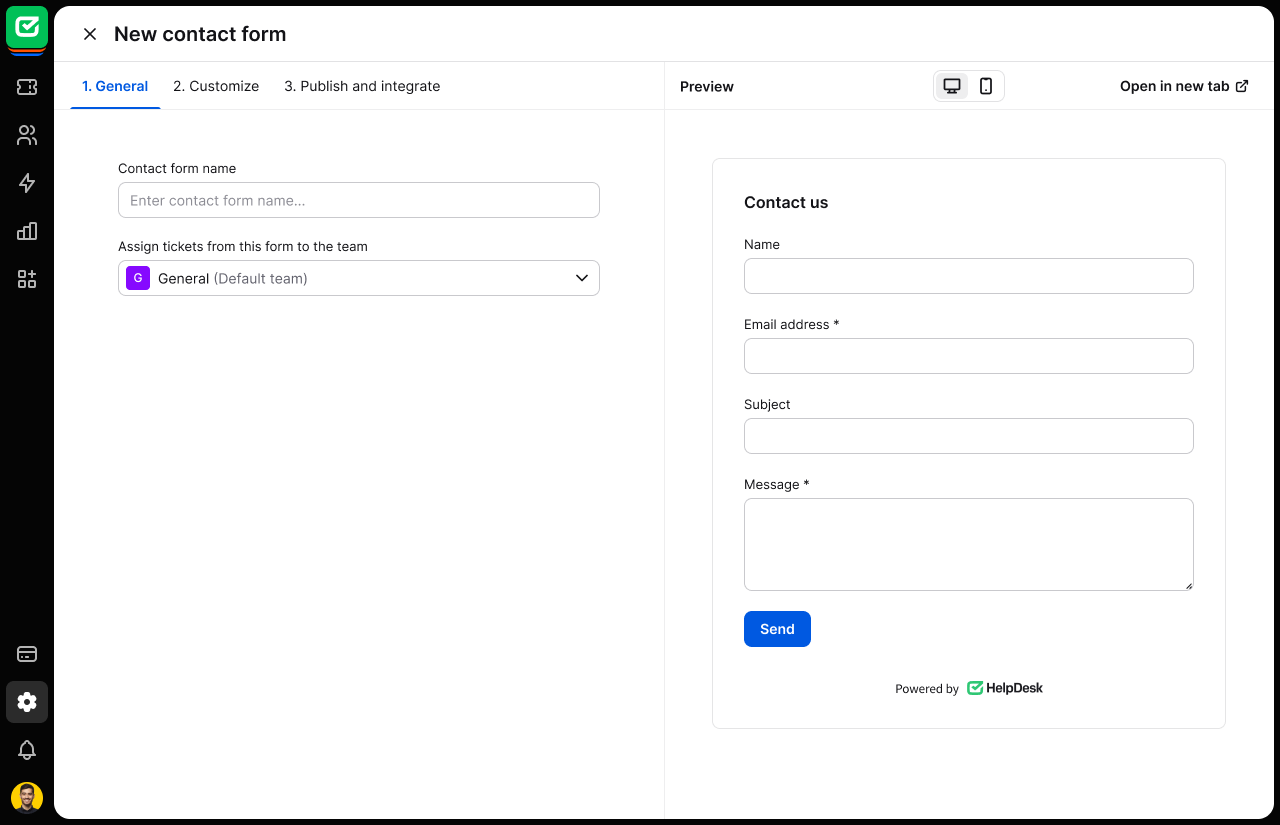
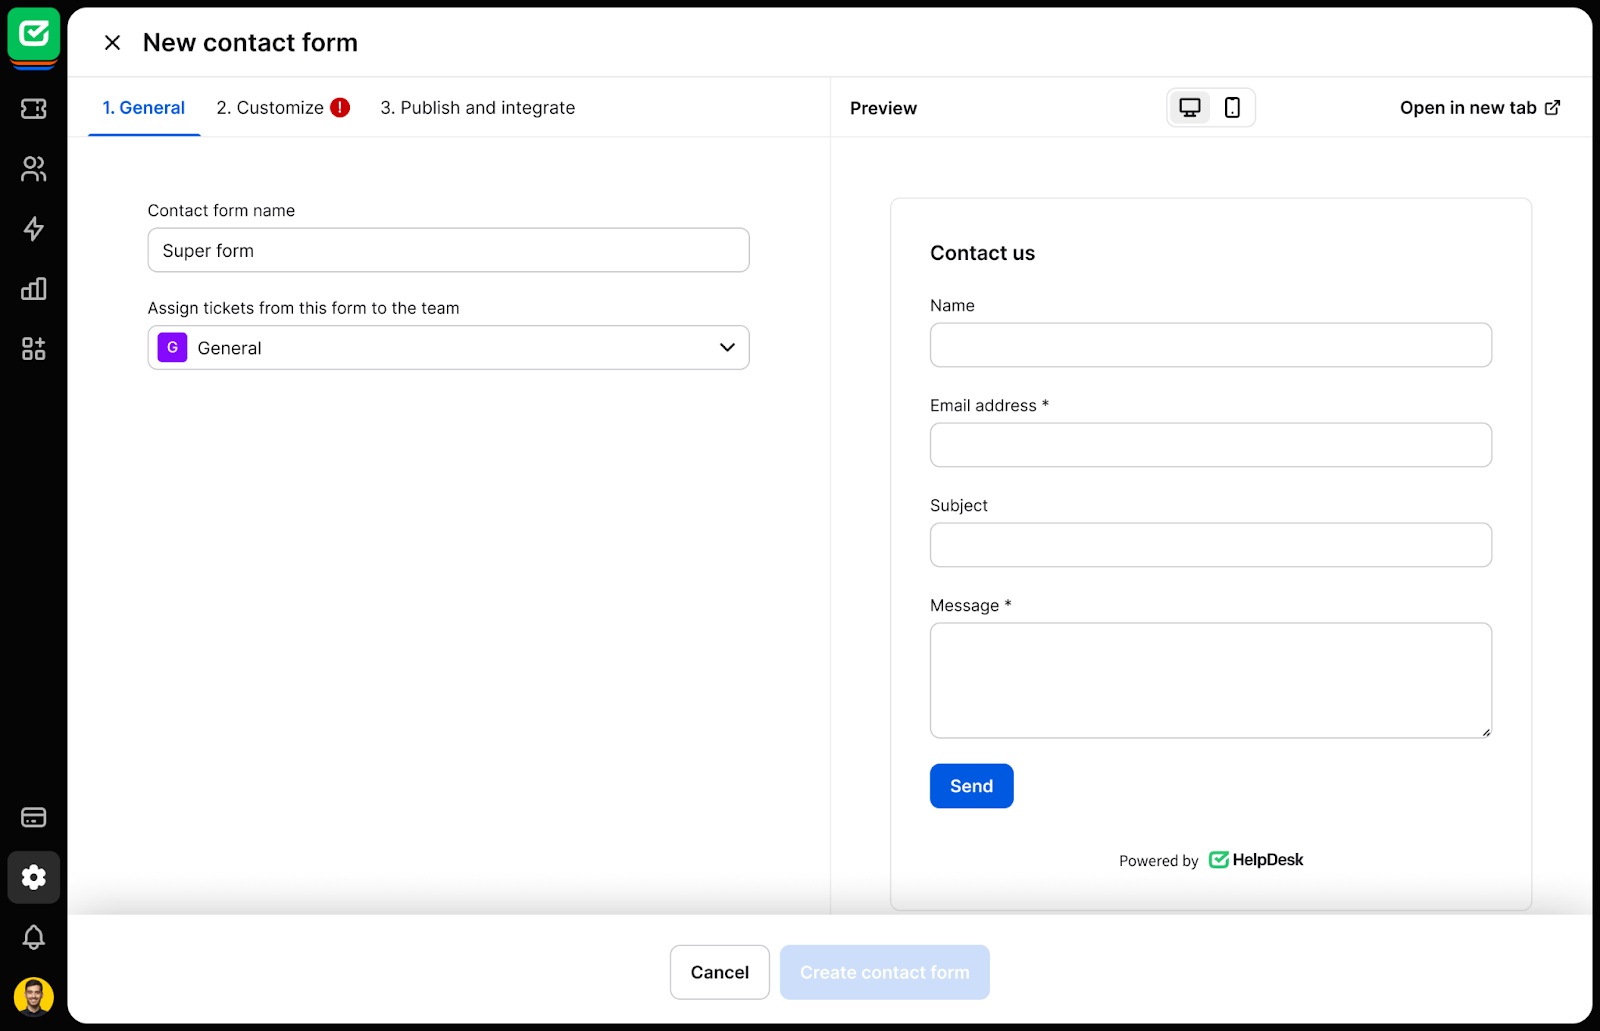
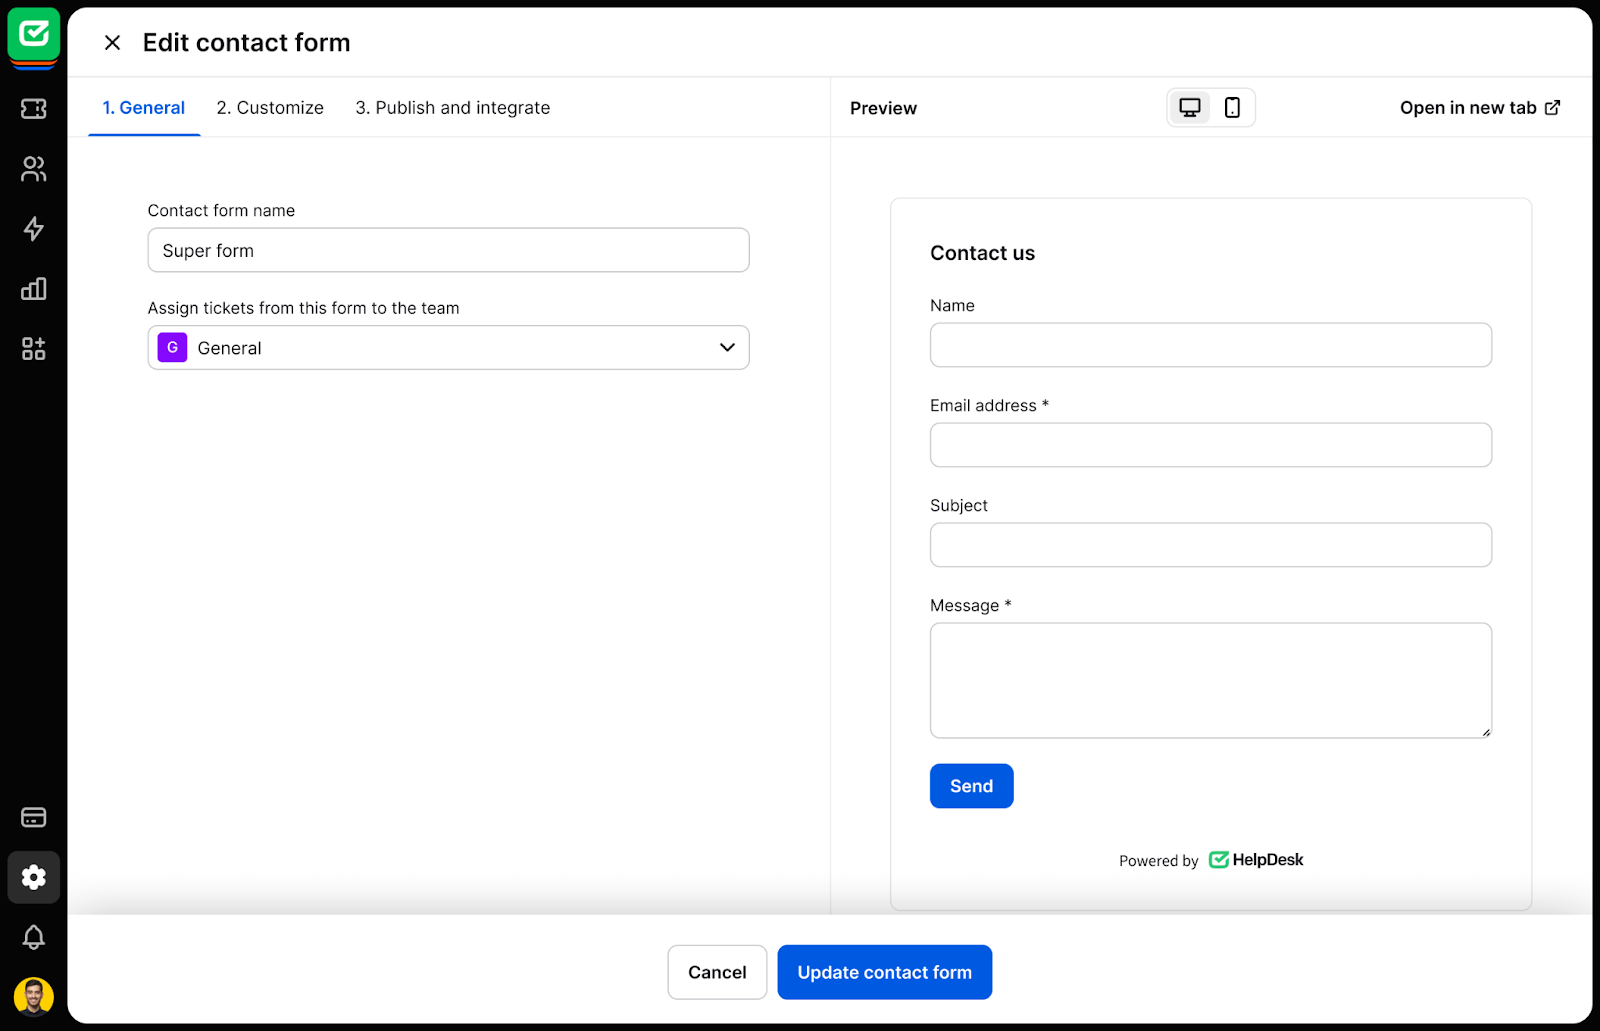
General
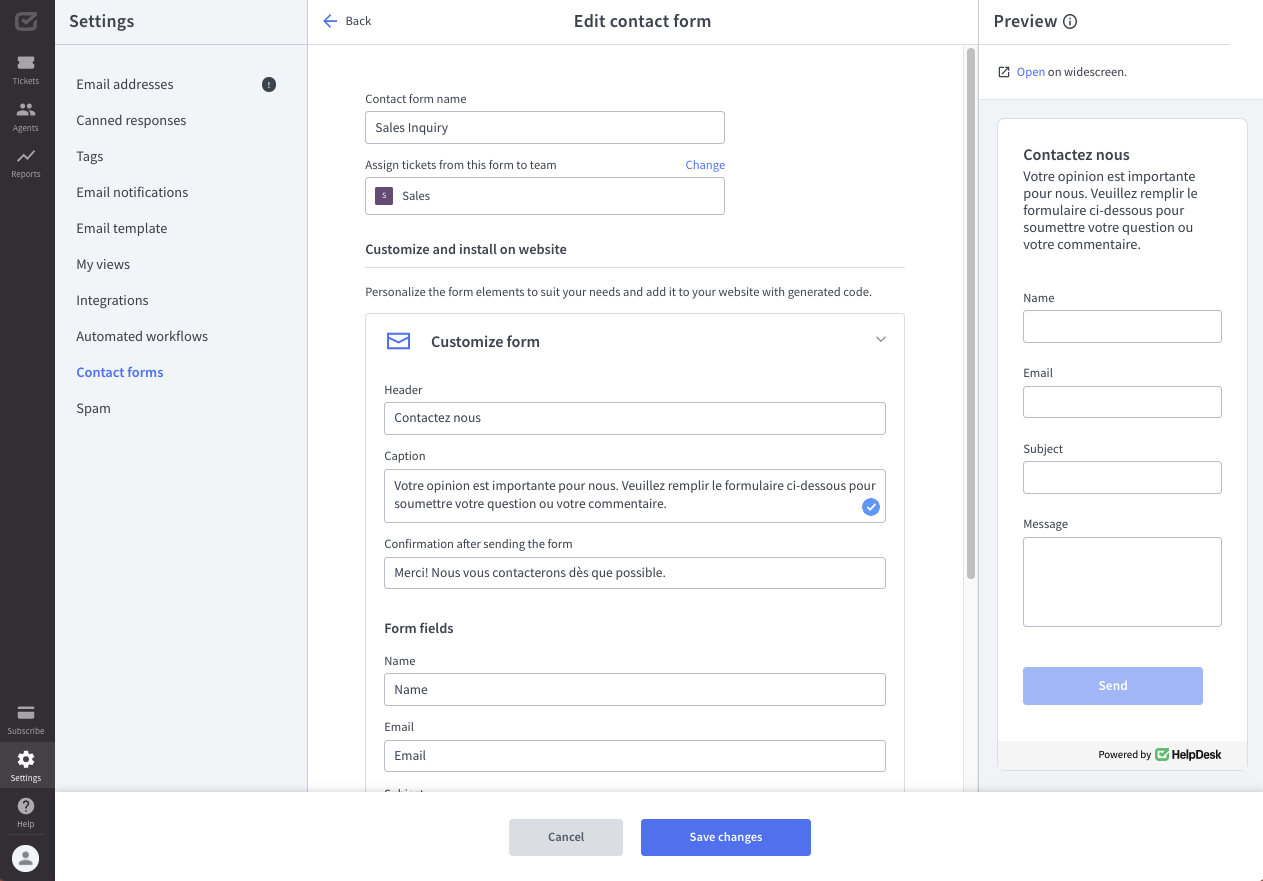
Enter the contact form name. Give your form a clear and descriptive name (for example, “Support Form” or “Feedback Form”).
Then, assign tickets from the contact form to a team. By default, tickets are assigned to the “General” team, but you can customize this to suit your workflow.
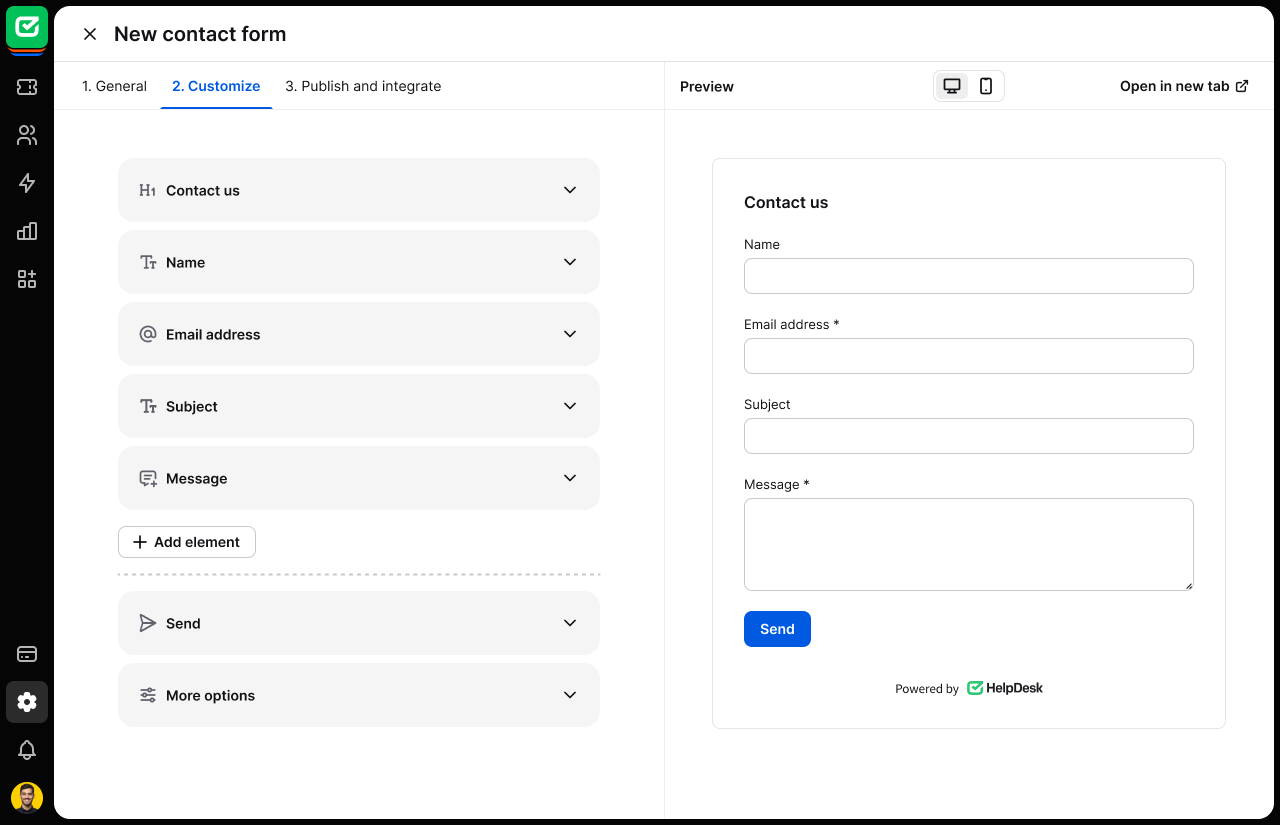
Customize
Switch to the “Customize” tab to design the form. Use the preview to see your changes in real time.
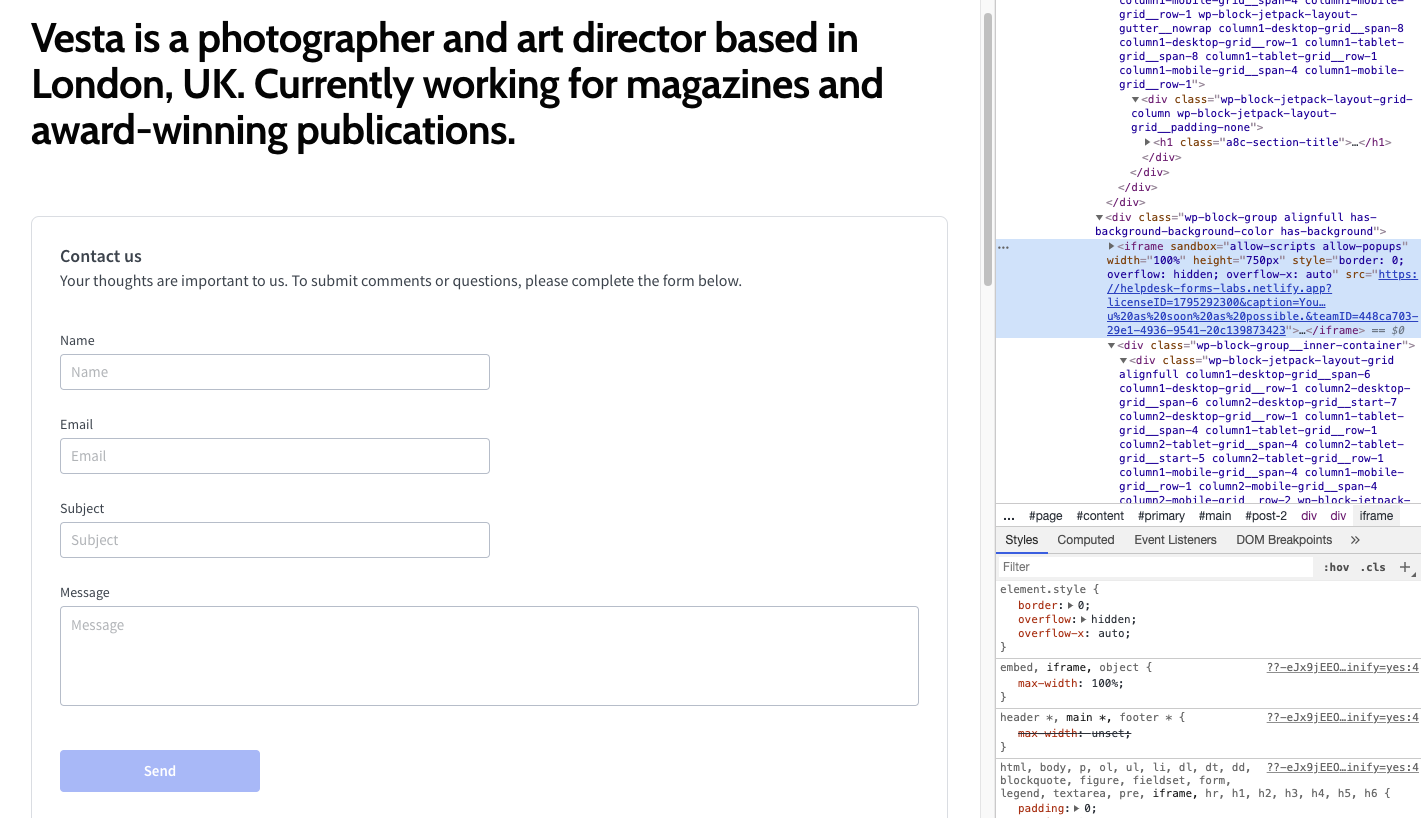
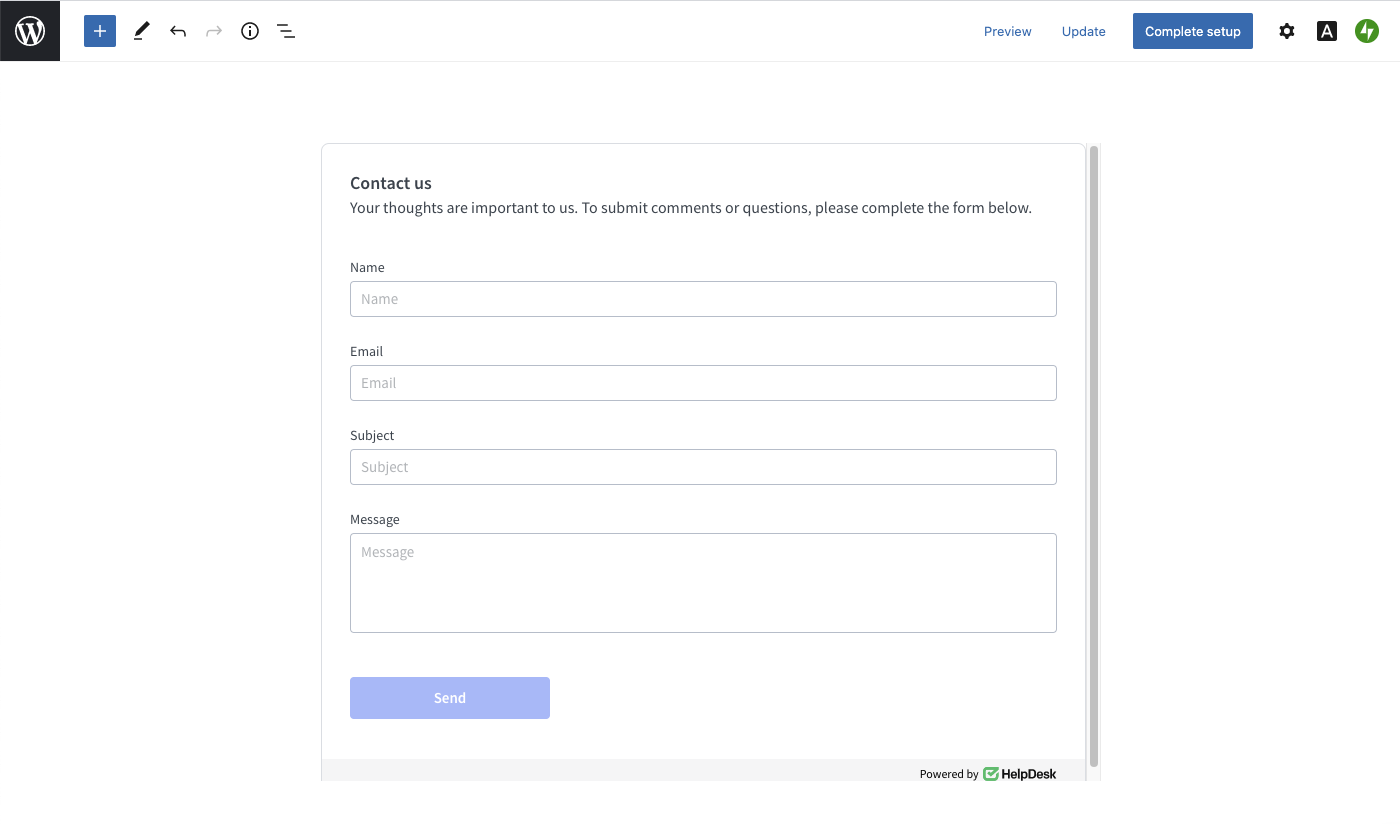
The good thing is that we’ve made it easy for you to get started and pre-filled the contact form with text. Add your changes to meet your needs. The default contact form fields are:
- Heading. By default, the form’s heading is “Contact us.” You can personalize it to reflect your business or purpose.
- Name. A field to capture the recipient’s name. This field is optional.
- Email address. The only required field to ensure recipient responses can be processed.
- Subject. A field for a brief summary of the recipient’s inquiry. This field is optional.
- Message. A field for detailing the recipient’s inquiry. This field is optional unless customized otherwise.
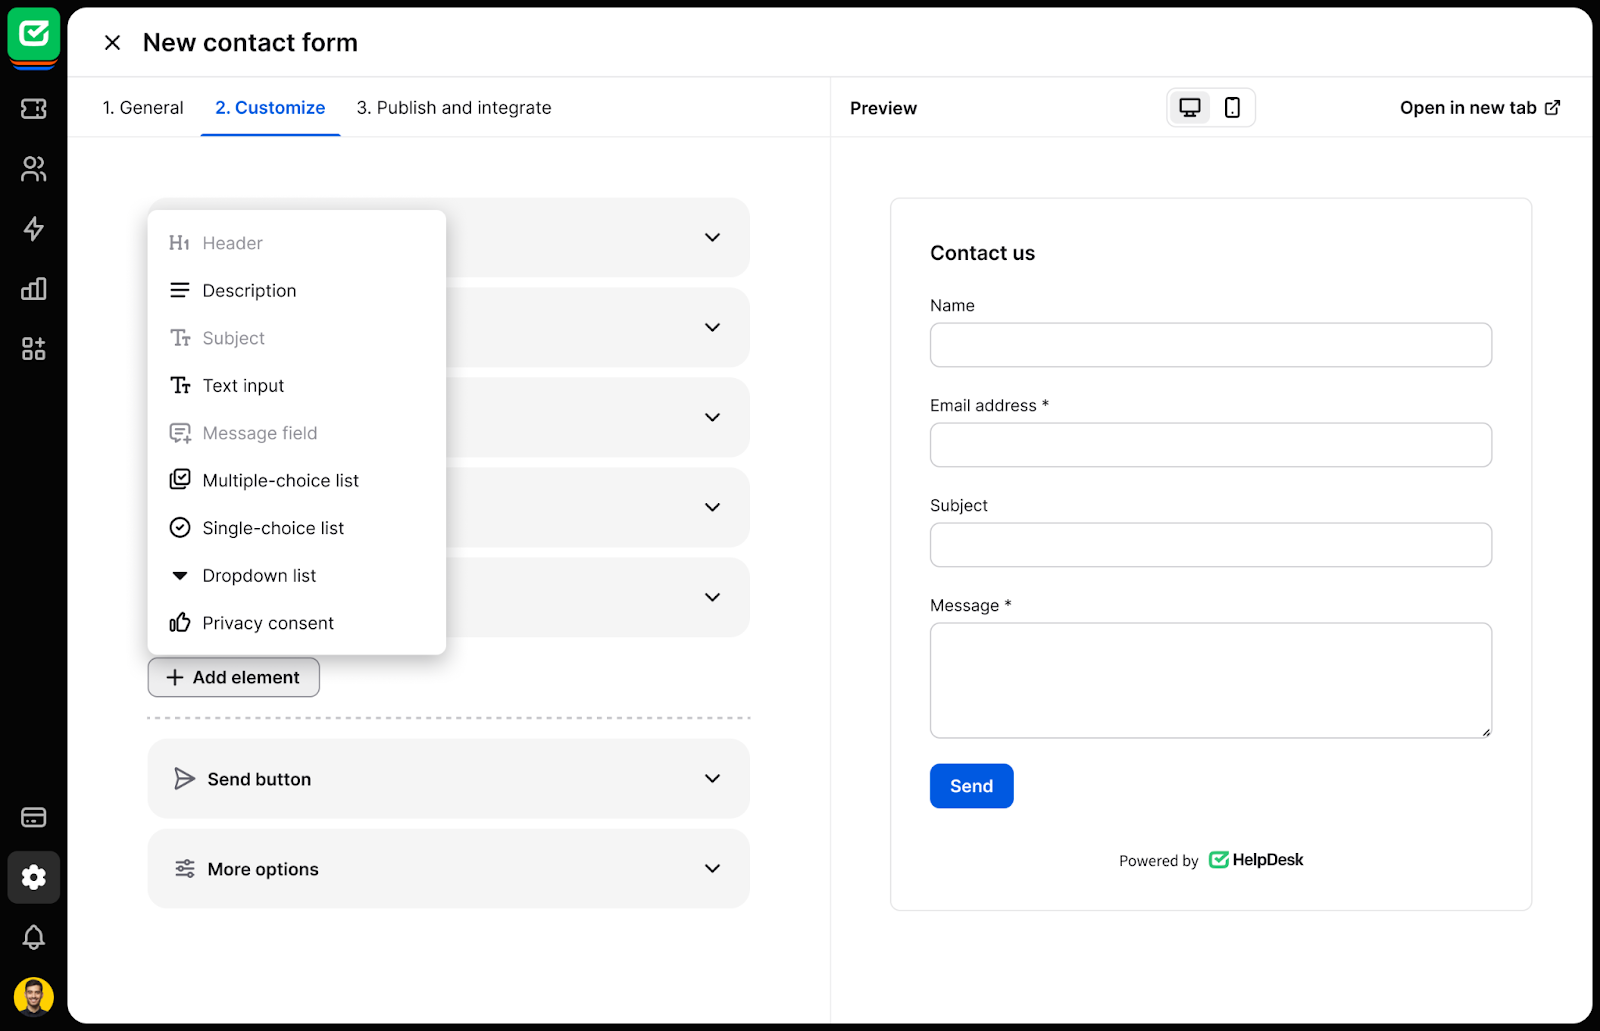
Add element
Use the “Add element” button to include additional fields and elements in your form:
- Header. Add a custom title or section header to organize your form.
- Description. Provide a brief description or instructions for filling out the form.
- Text input. Add fields for open-ended responses (additional information, comments, etc.).
- Multiple-choice list. Allow recipients to select more than one option from a list.
- Single-choice list. Enable recipients to select only one option from a predefined list.
- Dropdown list. Use a compact dropdown to select from a list of options.
- Privacy consent. Include a checkbox for privacy agreements or terms of service acknowledgment.
Send button
Customize the behavior and design of the “Send” button:
- Button content. Set the text displayed on the button (default is “Send”).
- Wide button design. Enable a full-width button for better visibility and accessibility.
- Success notification. Define the text displayed on the button upon successful submission (for example, “Success!”).
- Error notification. Define the text displayed on the button when an error occurs (for example, “Error”).
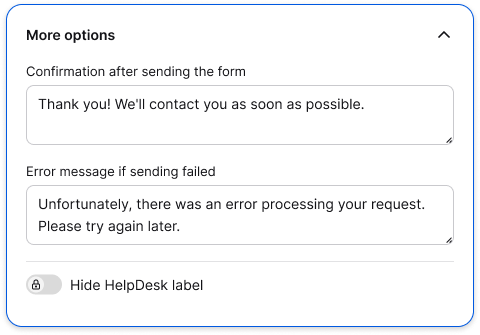
More options
Use the “More options” button to fine-tune additional form behavior:
- Confirmation message. Customize the message displayed after the form is successfully submitted (for example, “Thank you! We’ll contact you as soon as possible.”).
- Error message. Define the message shown when form submission fails (for example, “Unfortunately, there was an error processing your request. Please try again later.”).
- Hide HelpDesk label. Optionally remove the “Powered by HelpDesk” label from your contact form.
Preview contact form
See real-time changes to your contact form on the right in the “Preview” area.
You can also select the “Open in new tab” button to open the contact form on the widescreen, empathize with site visitors, and see what your contact form will look like.

Publish and integrate
Once satisfied with your design, navigate to the “Publish and Integrate” tab.
Publishing on a website
To embed the contact form directly on your website:
- Copy the provided embed code.
- Paste the code into your website’s HTML where you want the contact form to appear.
- Refresh your website to ensure the contact form is displayed correctly.
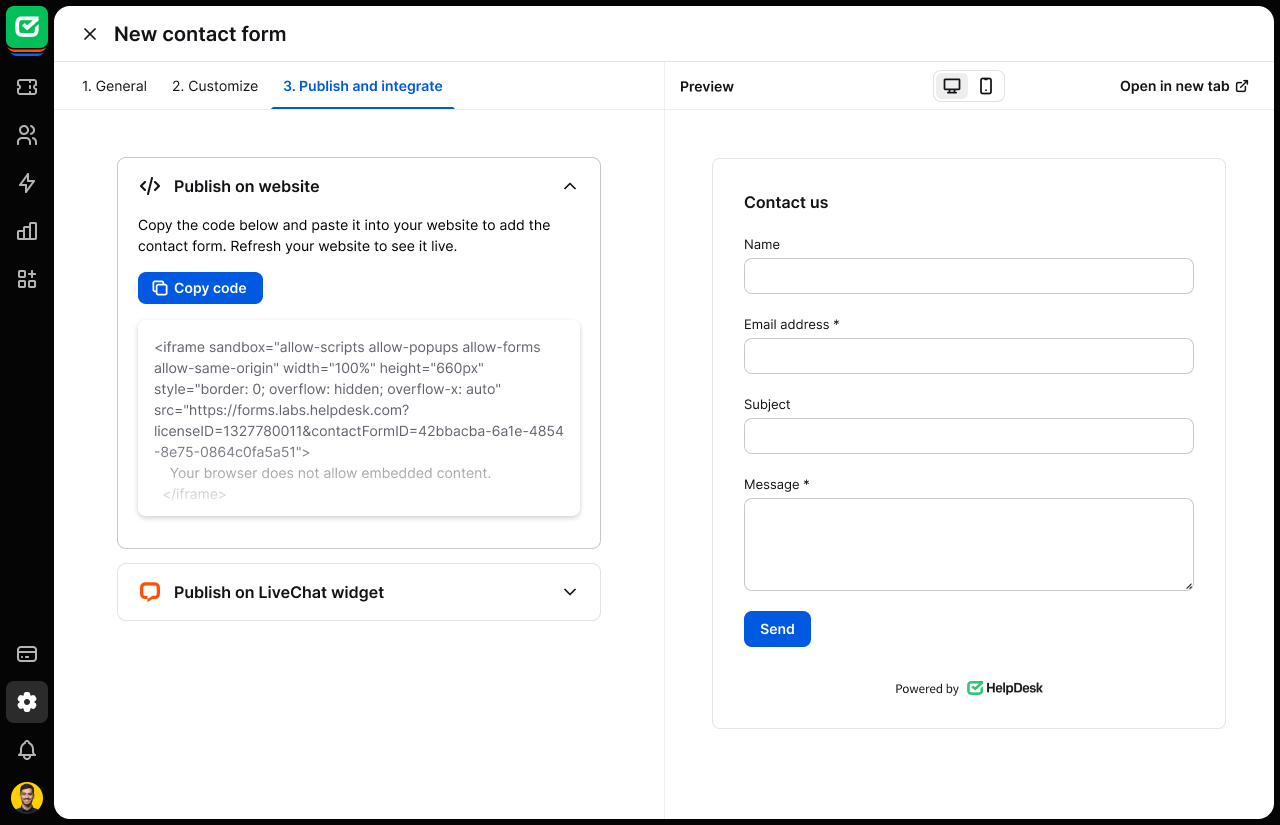
Select the “Copy code” button. Then, paste the copied code to embed the contact form on your website. Insert the code in a convenient place on your website, such as the Contact page, About page, or footer.
How to add a contact form on WordPress
To add the HelpDesk contact form, go to your WordPress account and edit the website. Select a place where you want to add a new block with a contact form.
You can find the HelpDesk contact form in the contact form settings.
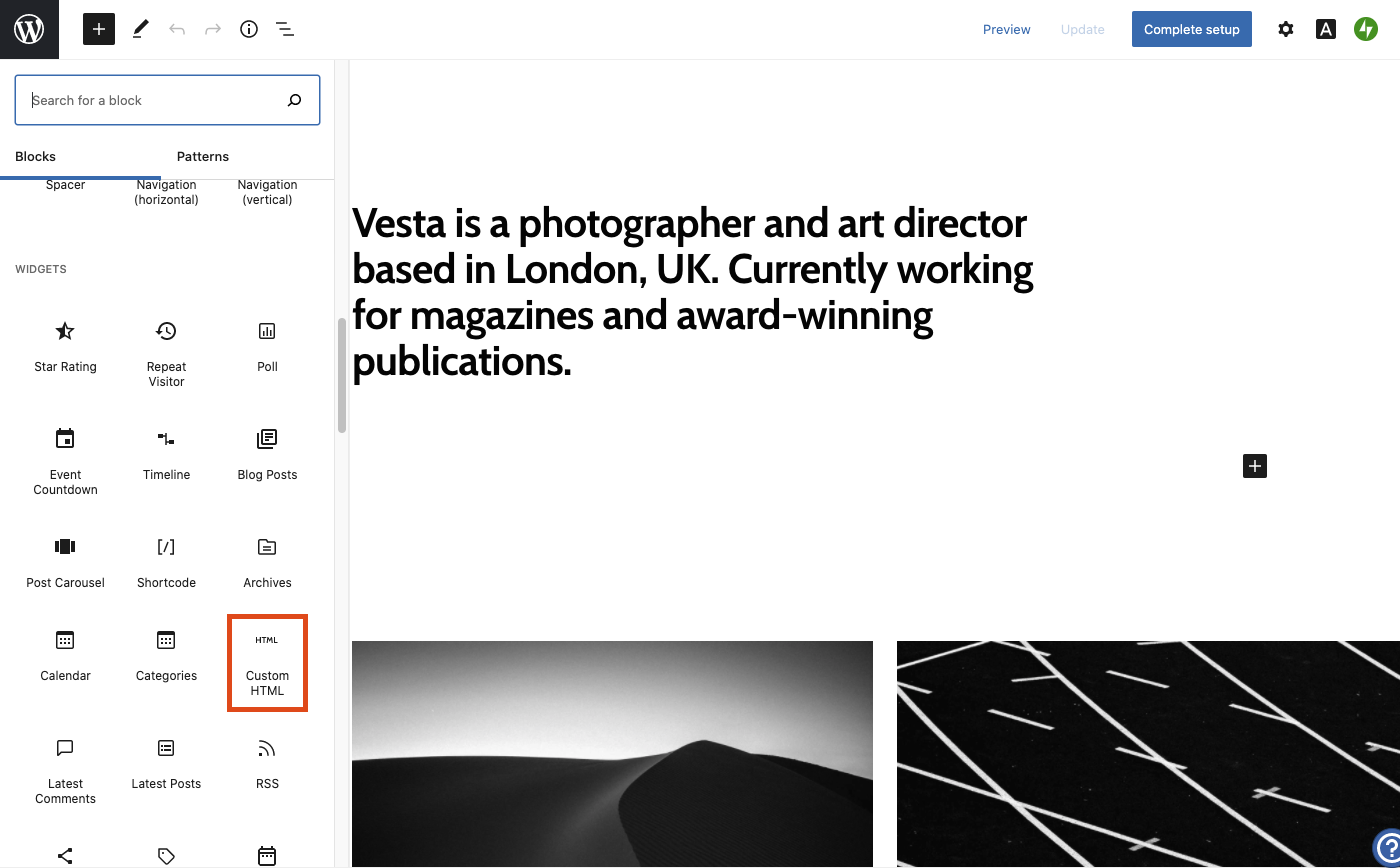
Select the “+” button to add a new block.
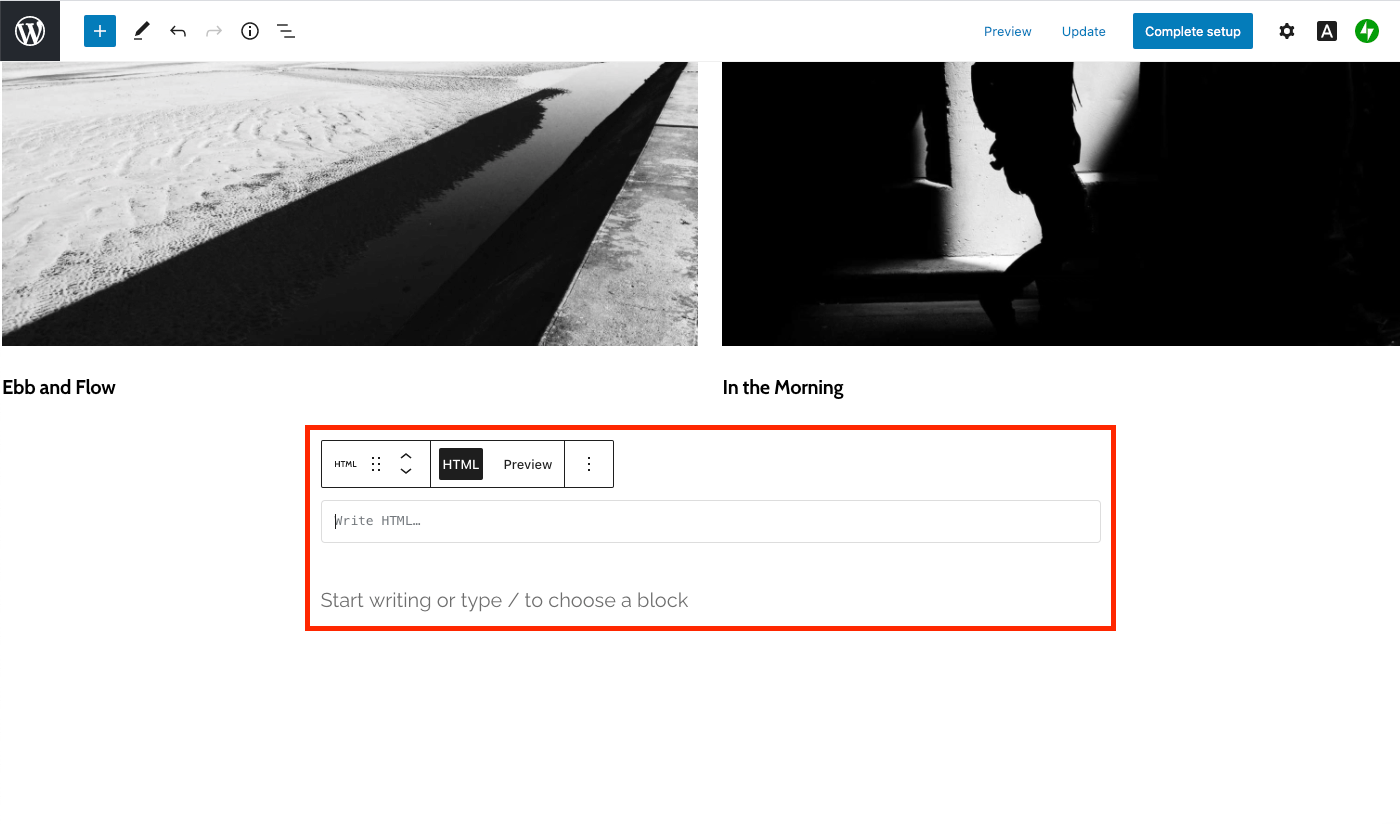
Scroll to the section with the widgets. Select the “Custom HTML” block.
In this field, you can paste the generated HTML code.
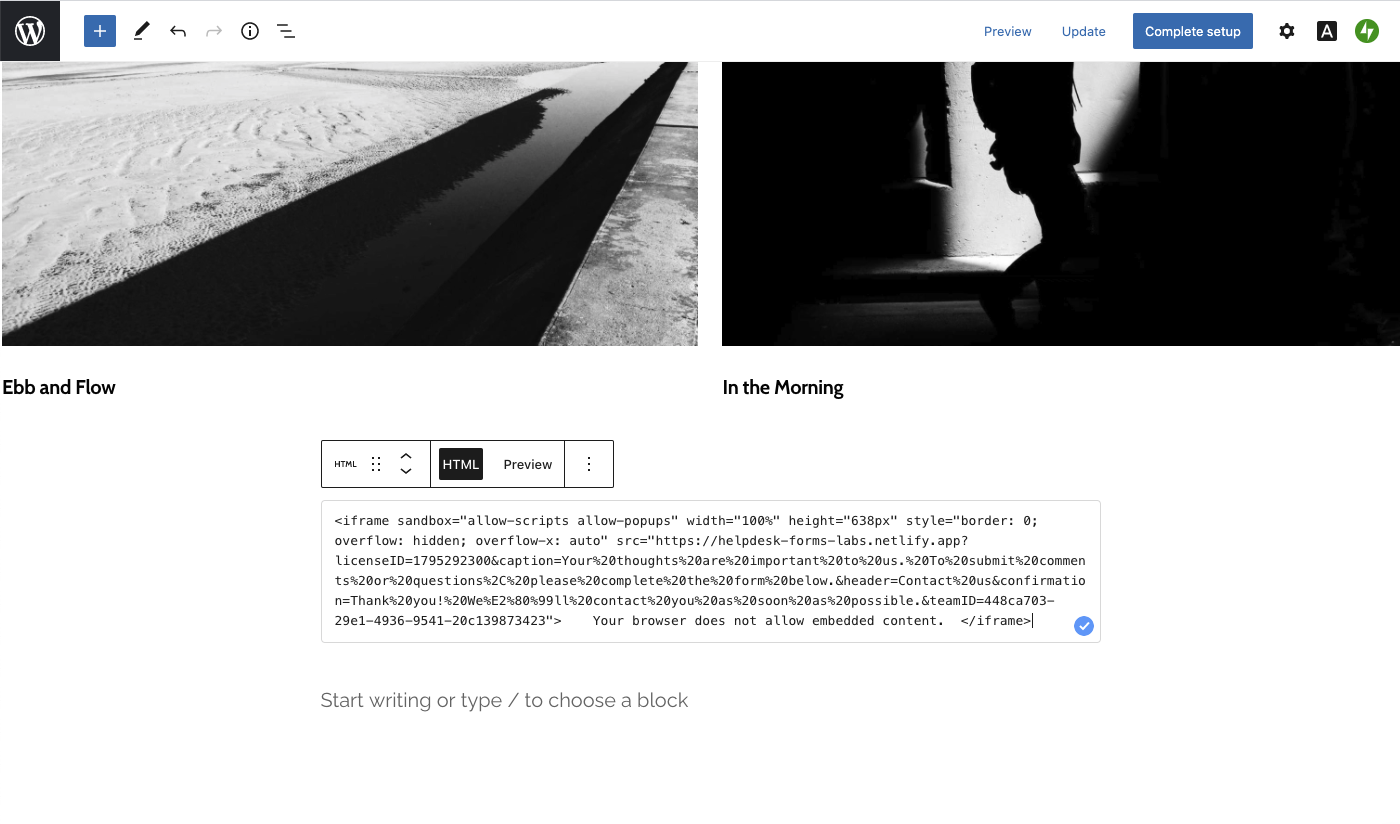
Select the “Preview” button to see what the contact form will look like on your WordPress website.

Remember to save your changes.
What should you do when WordPress removes HTML iFrame tags?
Some versions of WordPress remove iFrame HTML tags to ensure a proper security level. If this happens to you, you’ll see the message, “Your browser does not allow embedded content.” The solution is the iFrame plugin, which allows you to get this feature through a WordPress webpage.
If your WordPress version blocks iFrame, use WordPress plugins to embed HTML.
This is an example of a WordPress shortcode for the iFrame plugin:
\[iframe src="link to your form" width="100%" height="638px" style="border: 0; overflow: hidden; overflow-x: auto;" sandbox="allow-scripts allow-popups"]
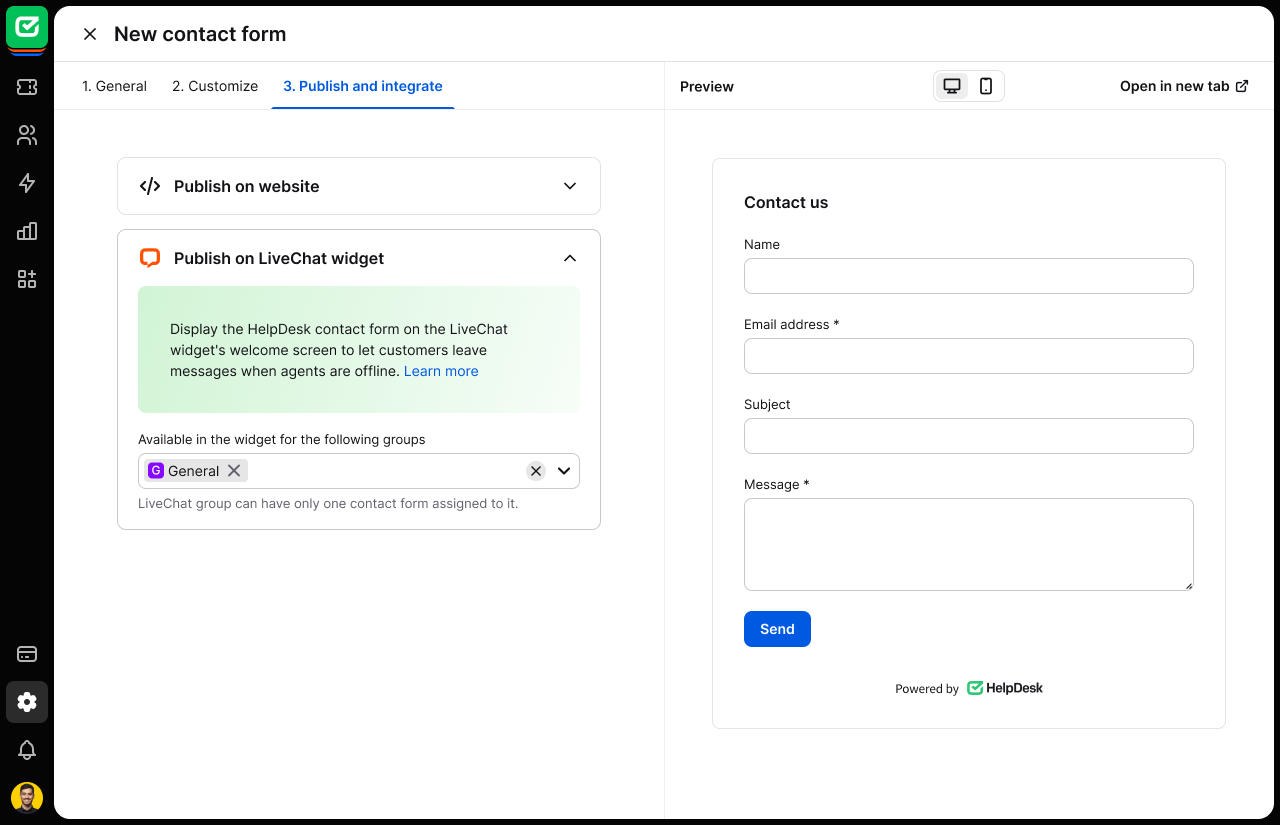
Publishing on the LiveChat widget
To display the form in your LiveChat widget:
- Select the “Publish on LiveChat widget” option.
- The form can be set to appear on the welcome screen of the widget, enabling customers to leave messages when agents are offline.
- Note: Each LiveChat group can have only one contact form assigned to it. Ensure the form is linked to the appropriate LiveChat group (for example, “General”).
Editing an existing contact form
To edit, select a form from your list and make changes in the editor. After saving, you’ll see a confirmation modal notifying you that the changes will immediately update the published version.
Duplicating the existing contact form
If you want to reuse a contact form, simply use the “Duplicate” action. This will copy the entire content of the form you selected, making it easy to create a new form without starting from scratch. It’s a great way to save time and effort!

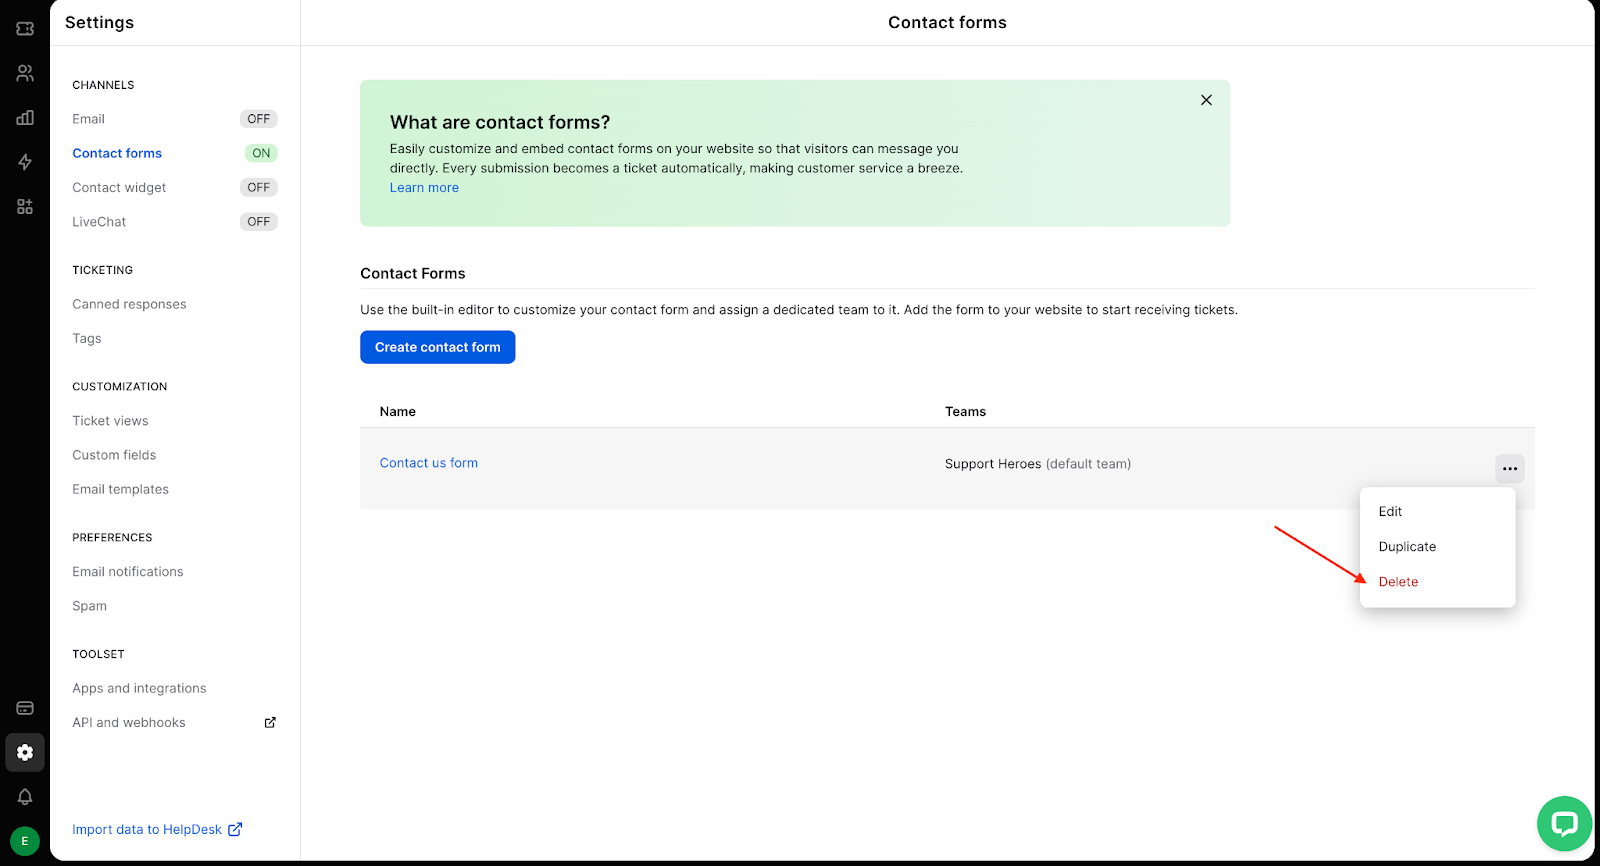
Deleting the existing contact form
If you need to delete a contact form, just go to your list of forms, pick the one you want to remove, and select the “Delete” button. A prompt will pop up to ensure you want to delete it. Once you confirm, the form will be gone for good, so save or back up anything important first — there’s no way to recover it afterward.
Contact form FAQs
Can I recover a deleted contact form?
Unfortunately, deleted forms cannot be recovered. Make sure to export or back up your form data before deletion.
What happens if I don’t assign a team?
Unassigned tickets will default to the “General” team for processing.
How many forms can I create?
In plans higher than Team, you can create multiple contact forms for different teams. Just select the team and generate a new code to add it to a convenient place on your website. If you need more than one contact form, check out the available plans and upgrade your account.
Can I create an IT request form to support my users?
Yes! You can use a contact form to create an IT request form and streamline support requests for your team. Check out how you can set up an IT request form to manage IT issues.