Agents are members of your organization who have access to your HelpDesk. In this article, you will learn how to manage agent accounts, including:
- How to add a new agent
- How to delete agent accounts
- How to edit agent accounts and what you can edit
As a supplement to your reading, we also recommend a detailed guide to inviting agents in Text Accounts, of which HelpDesk is a part.
Depending on your setup, either everyone on HelpDesk can add new people or only Admins can invite other teammates to join their HelpDesk license. The organization owner can check and change this setup in the Accounts panel.
How to add a new agent
Admins can add new agents. Here’s how to email your teammates to join you on HelpDesk.
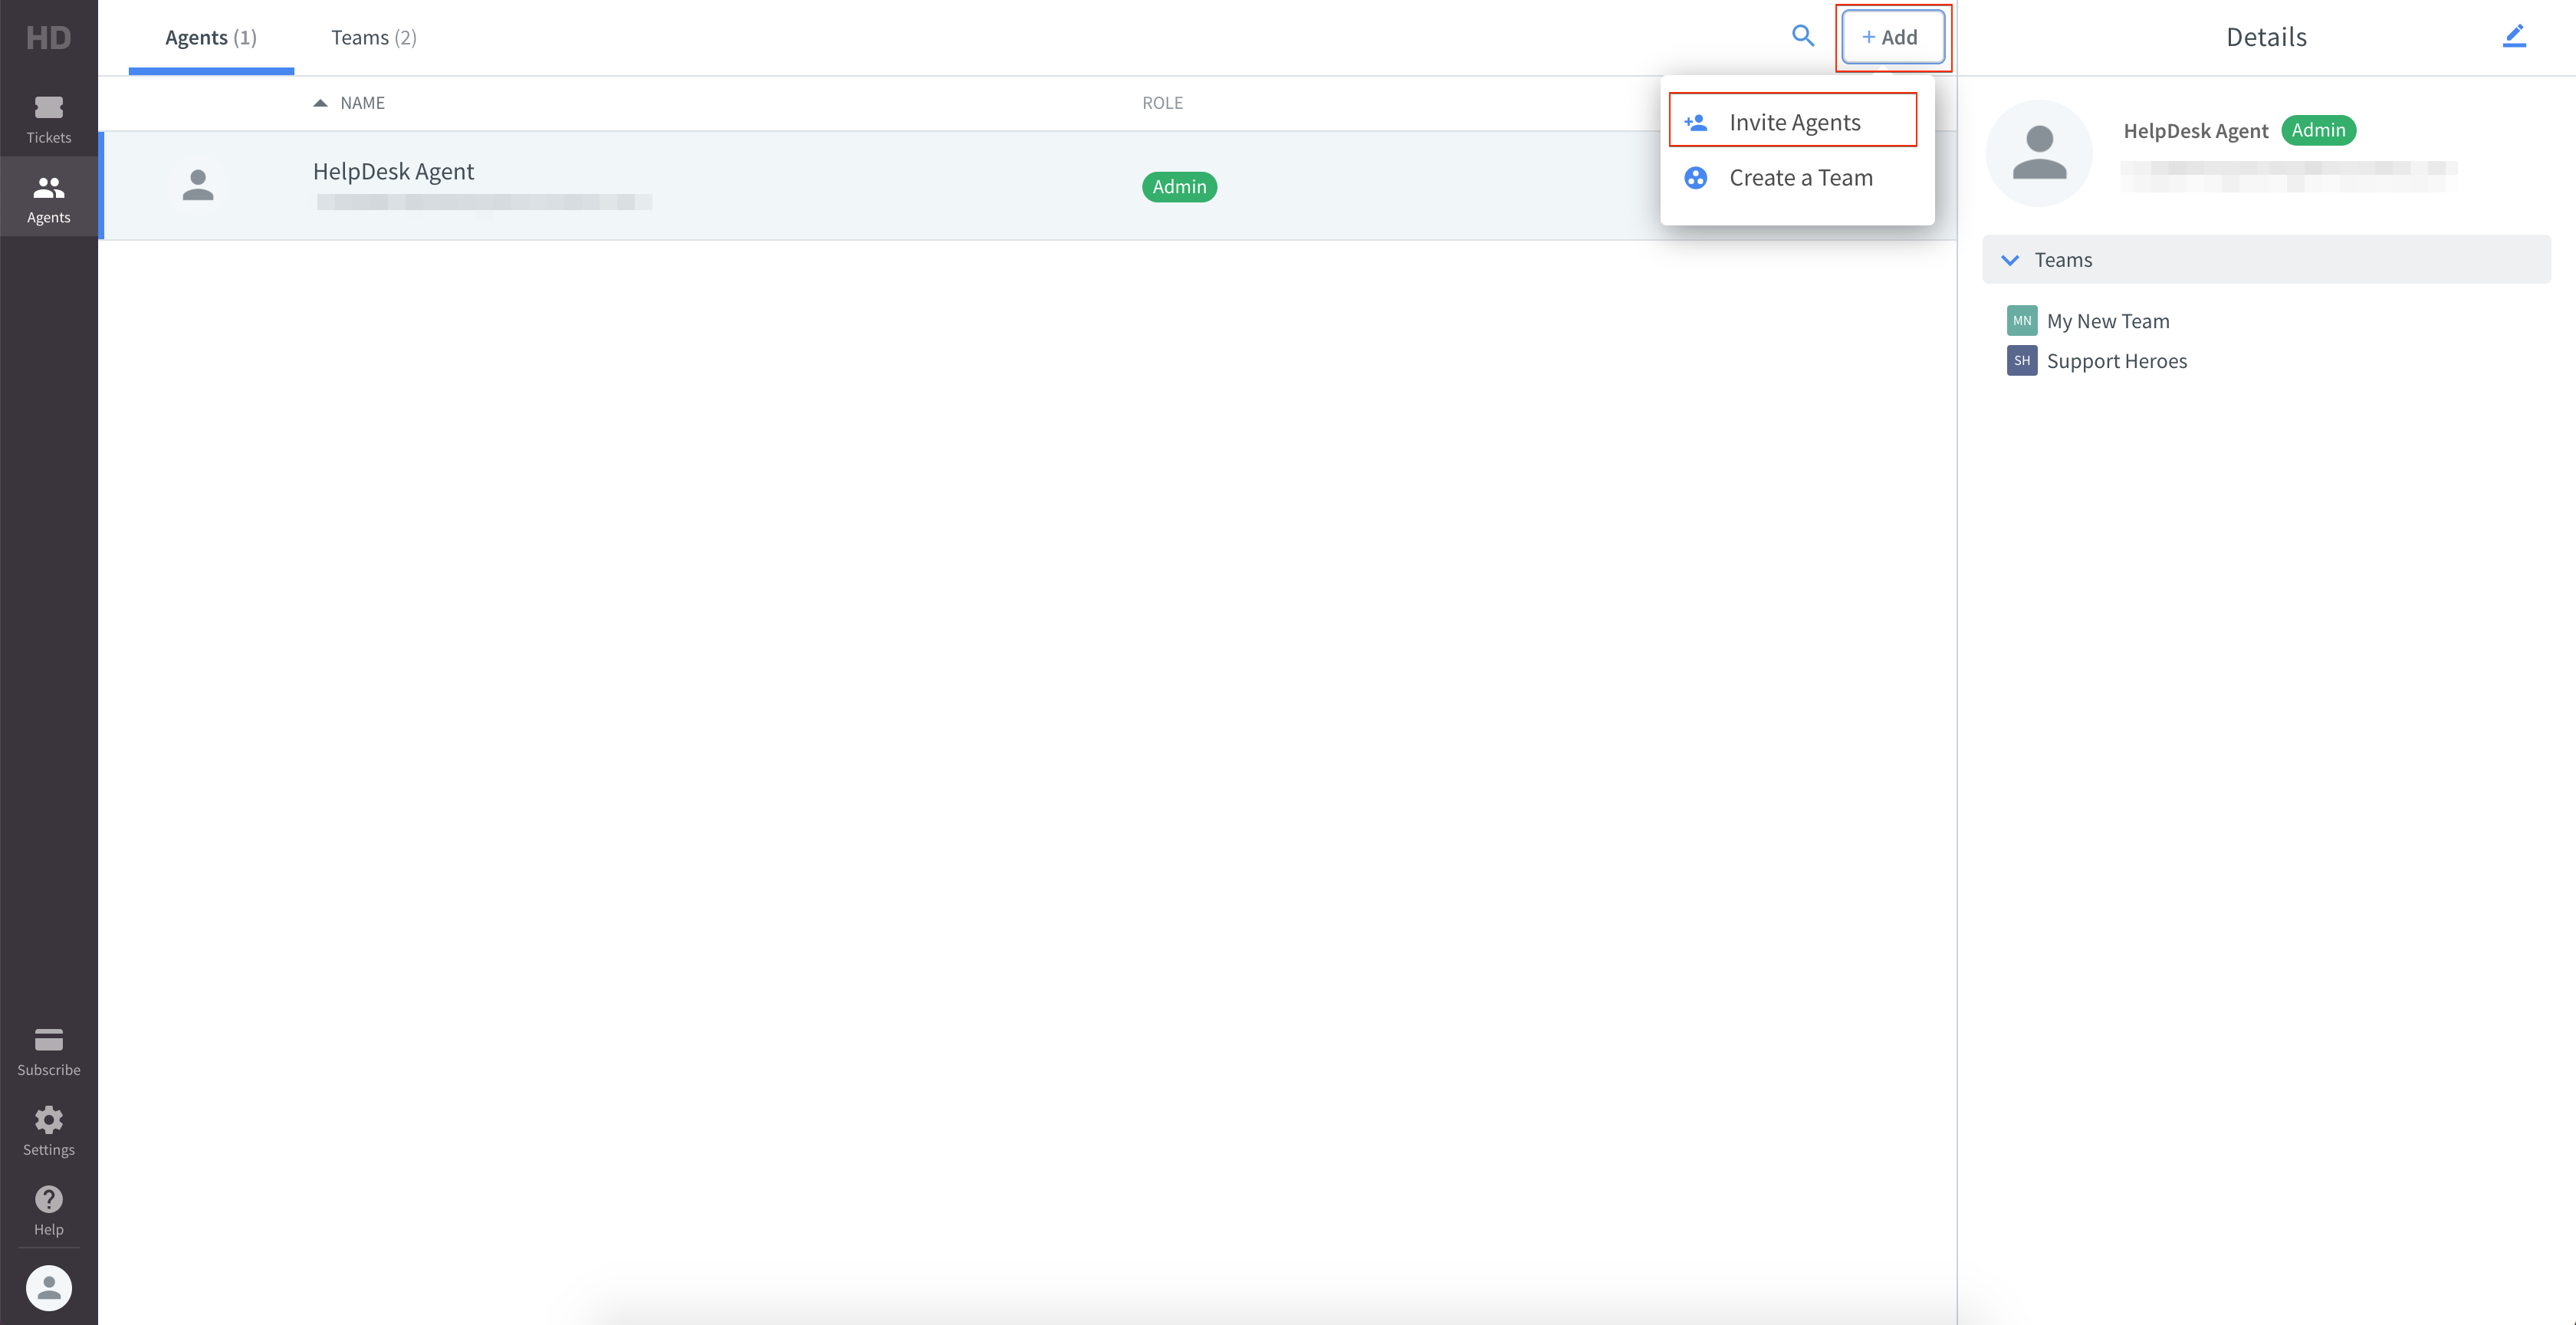
- Go to Agents.
- Click "+Add" in the upper-right corner and click “Invite agents.”
- Enter your teammate’s email (an invitation link will be sent to this email address).
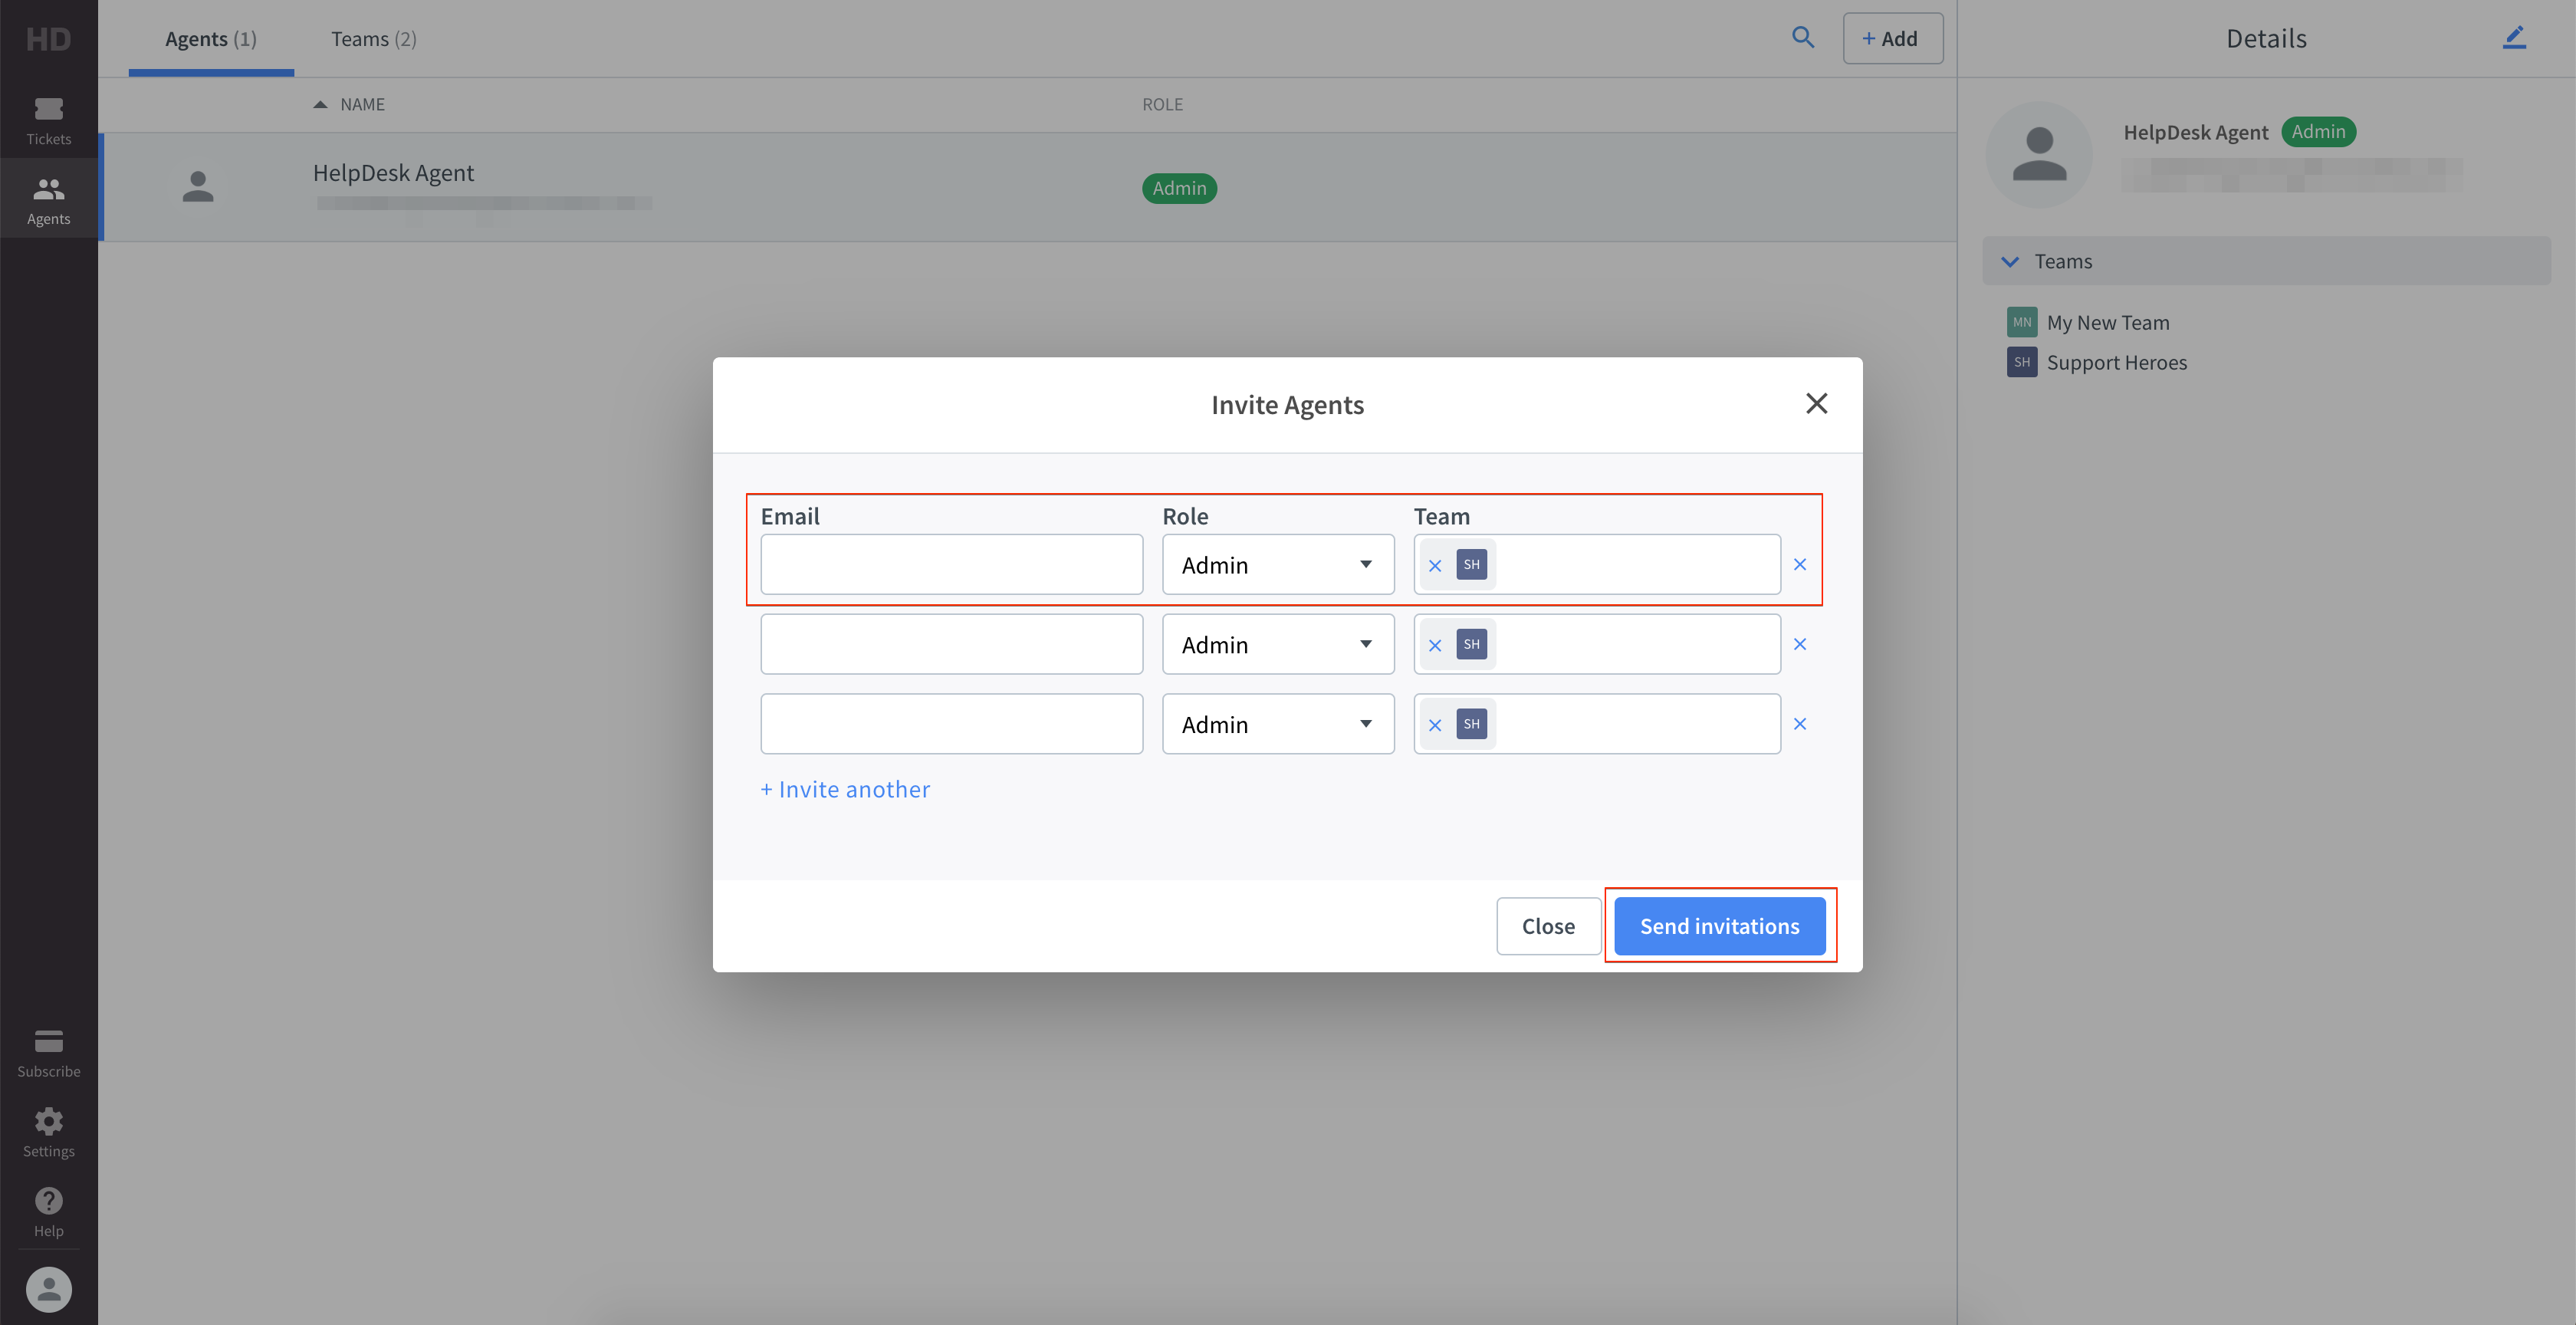
- Assign them to a team (optional if you have multiple teams).
- Click “Send invitations.”
- Your teammate(s) will receive an invitation email with a verification link. This link redirects to a login page where the Agent can choose a password and sign in.
How to edit or delete agent accounts
Agents can customize their accounts in Settings. However, if it’s necessary, admins can edit the account settings.
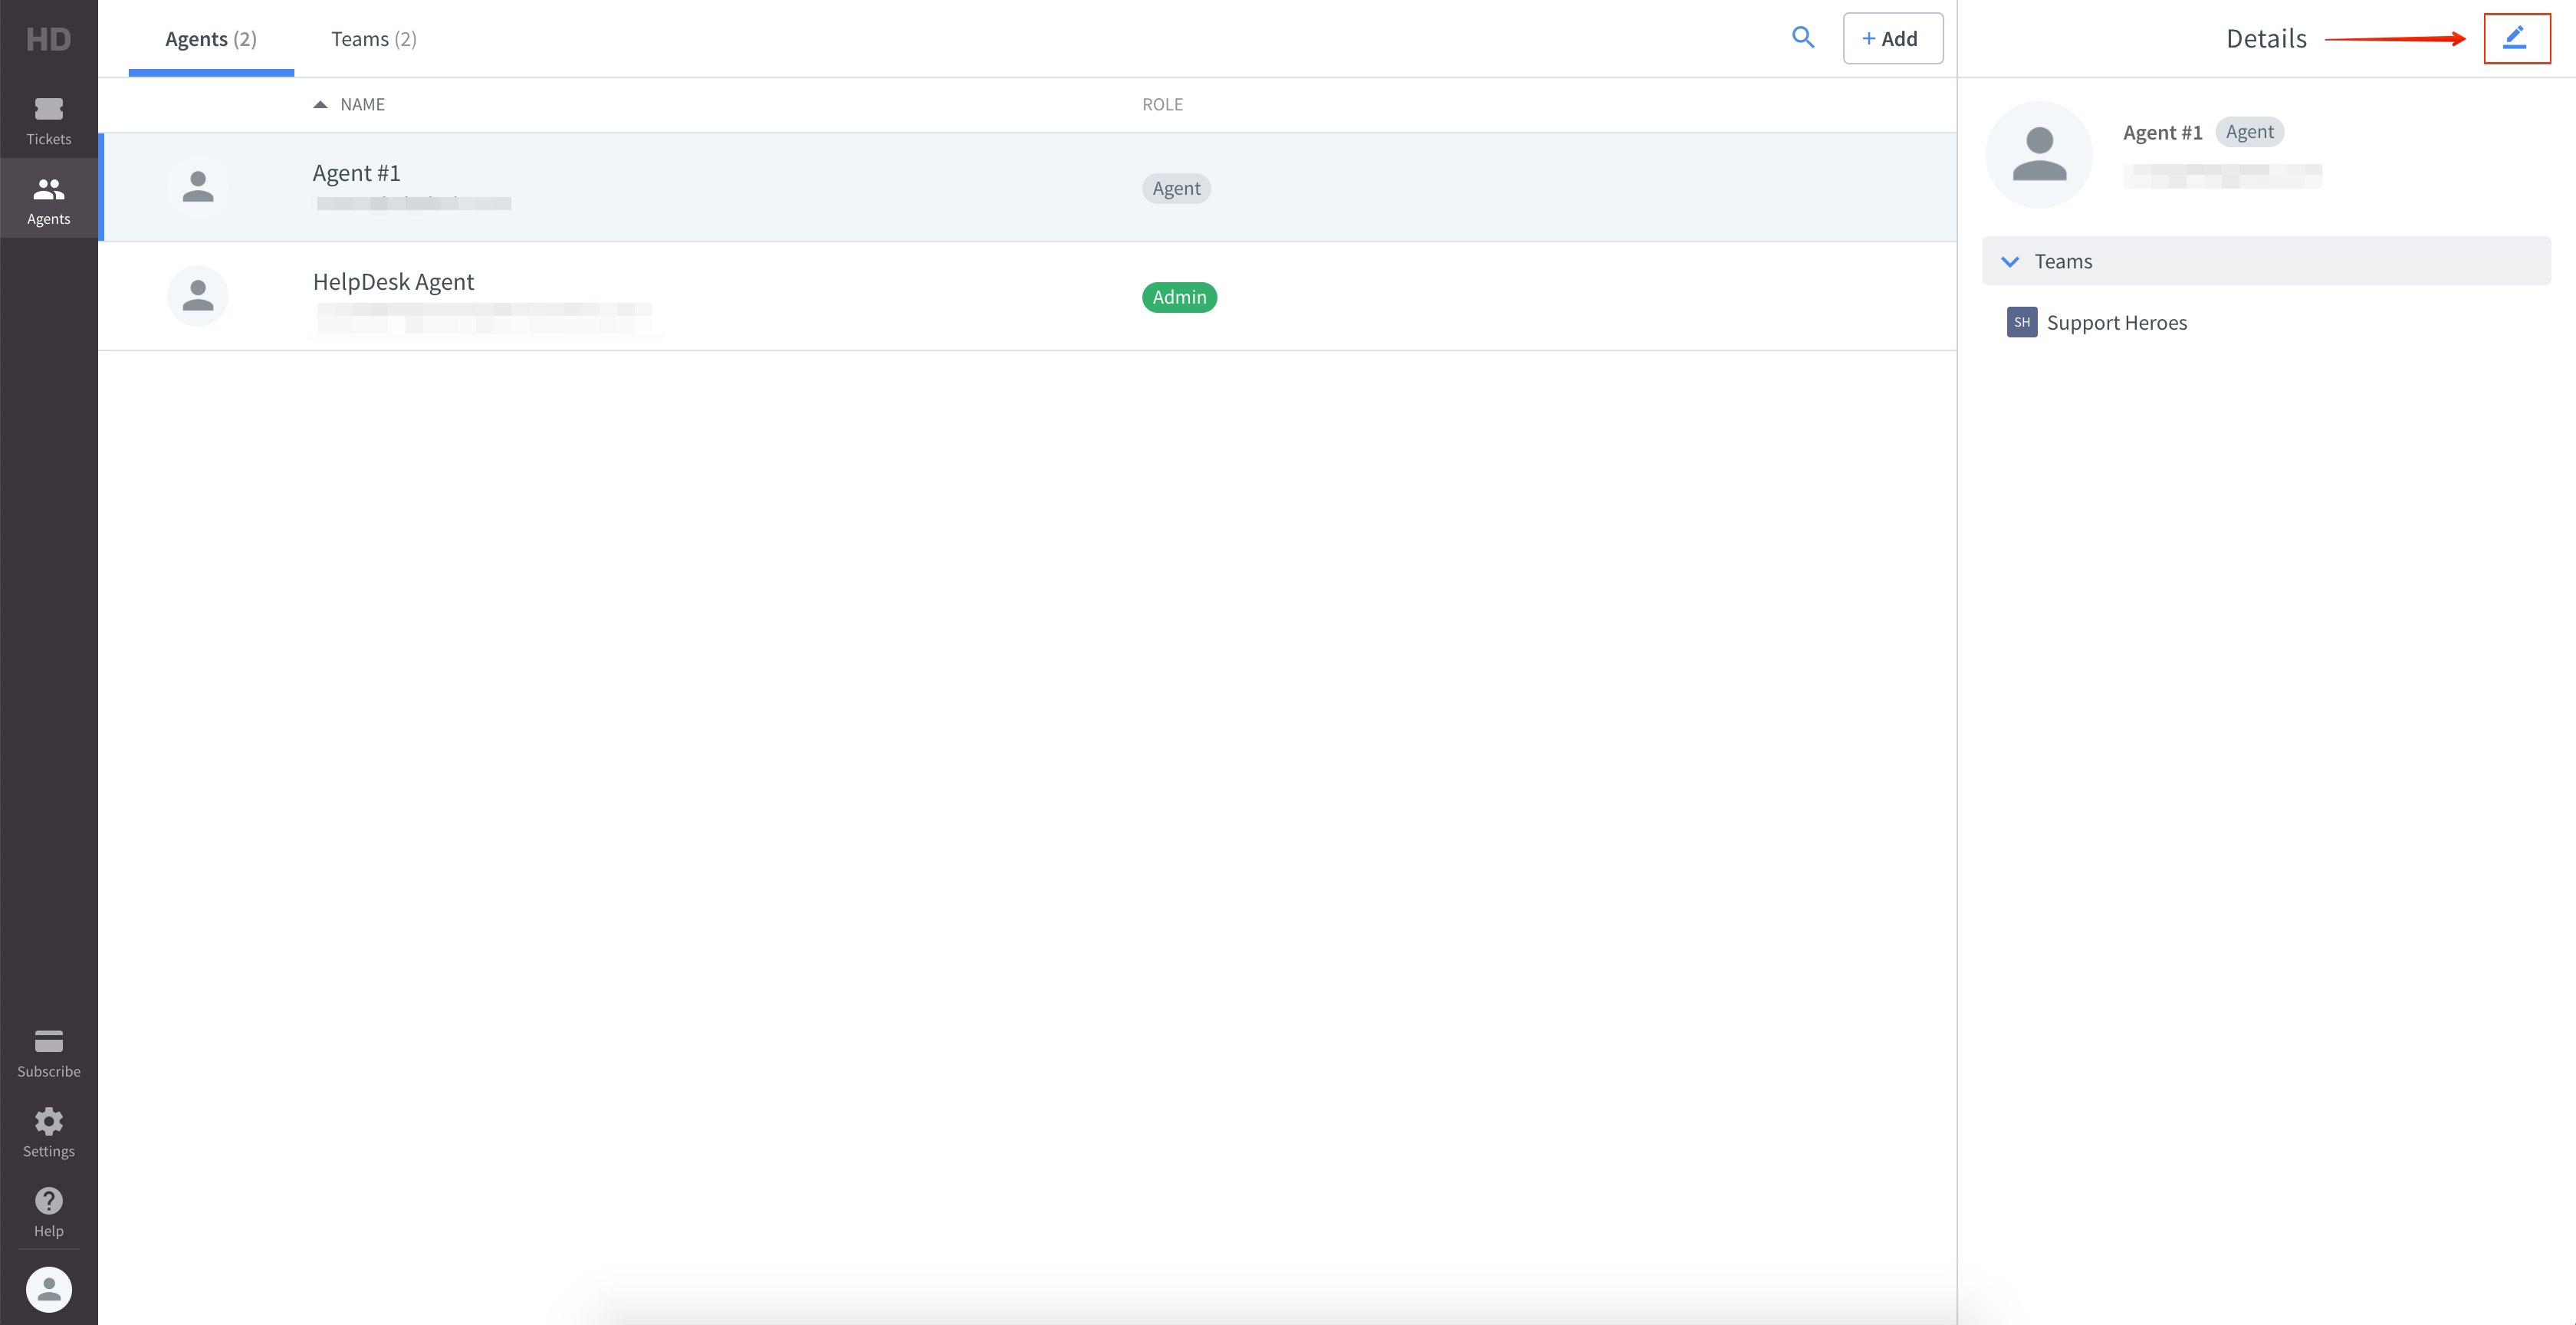
To edit an agent’s profile, go to the Agents section. Then, select an Agent from the list and click the edit icon in the upper-right corner.
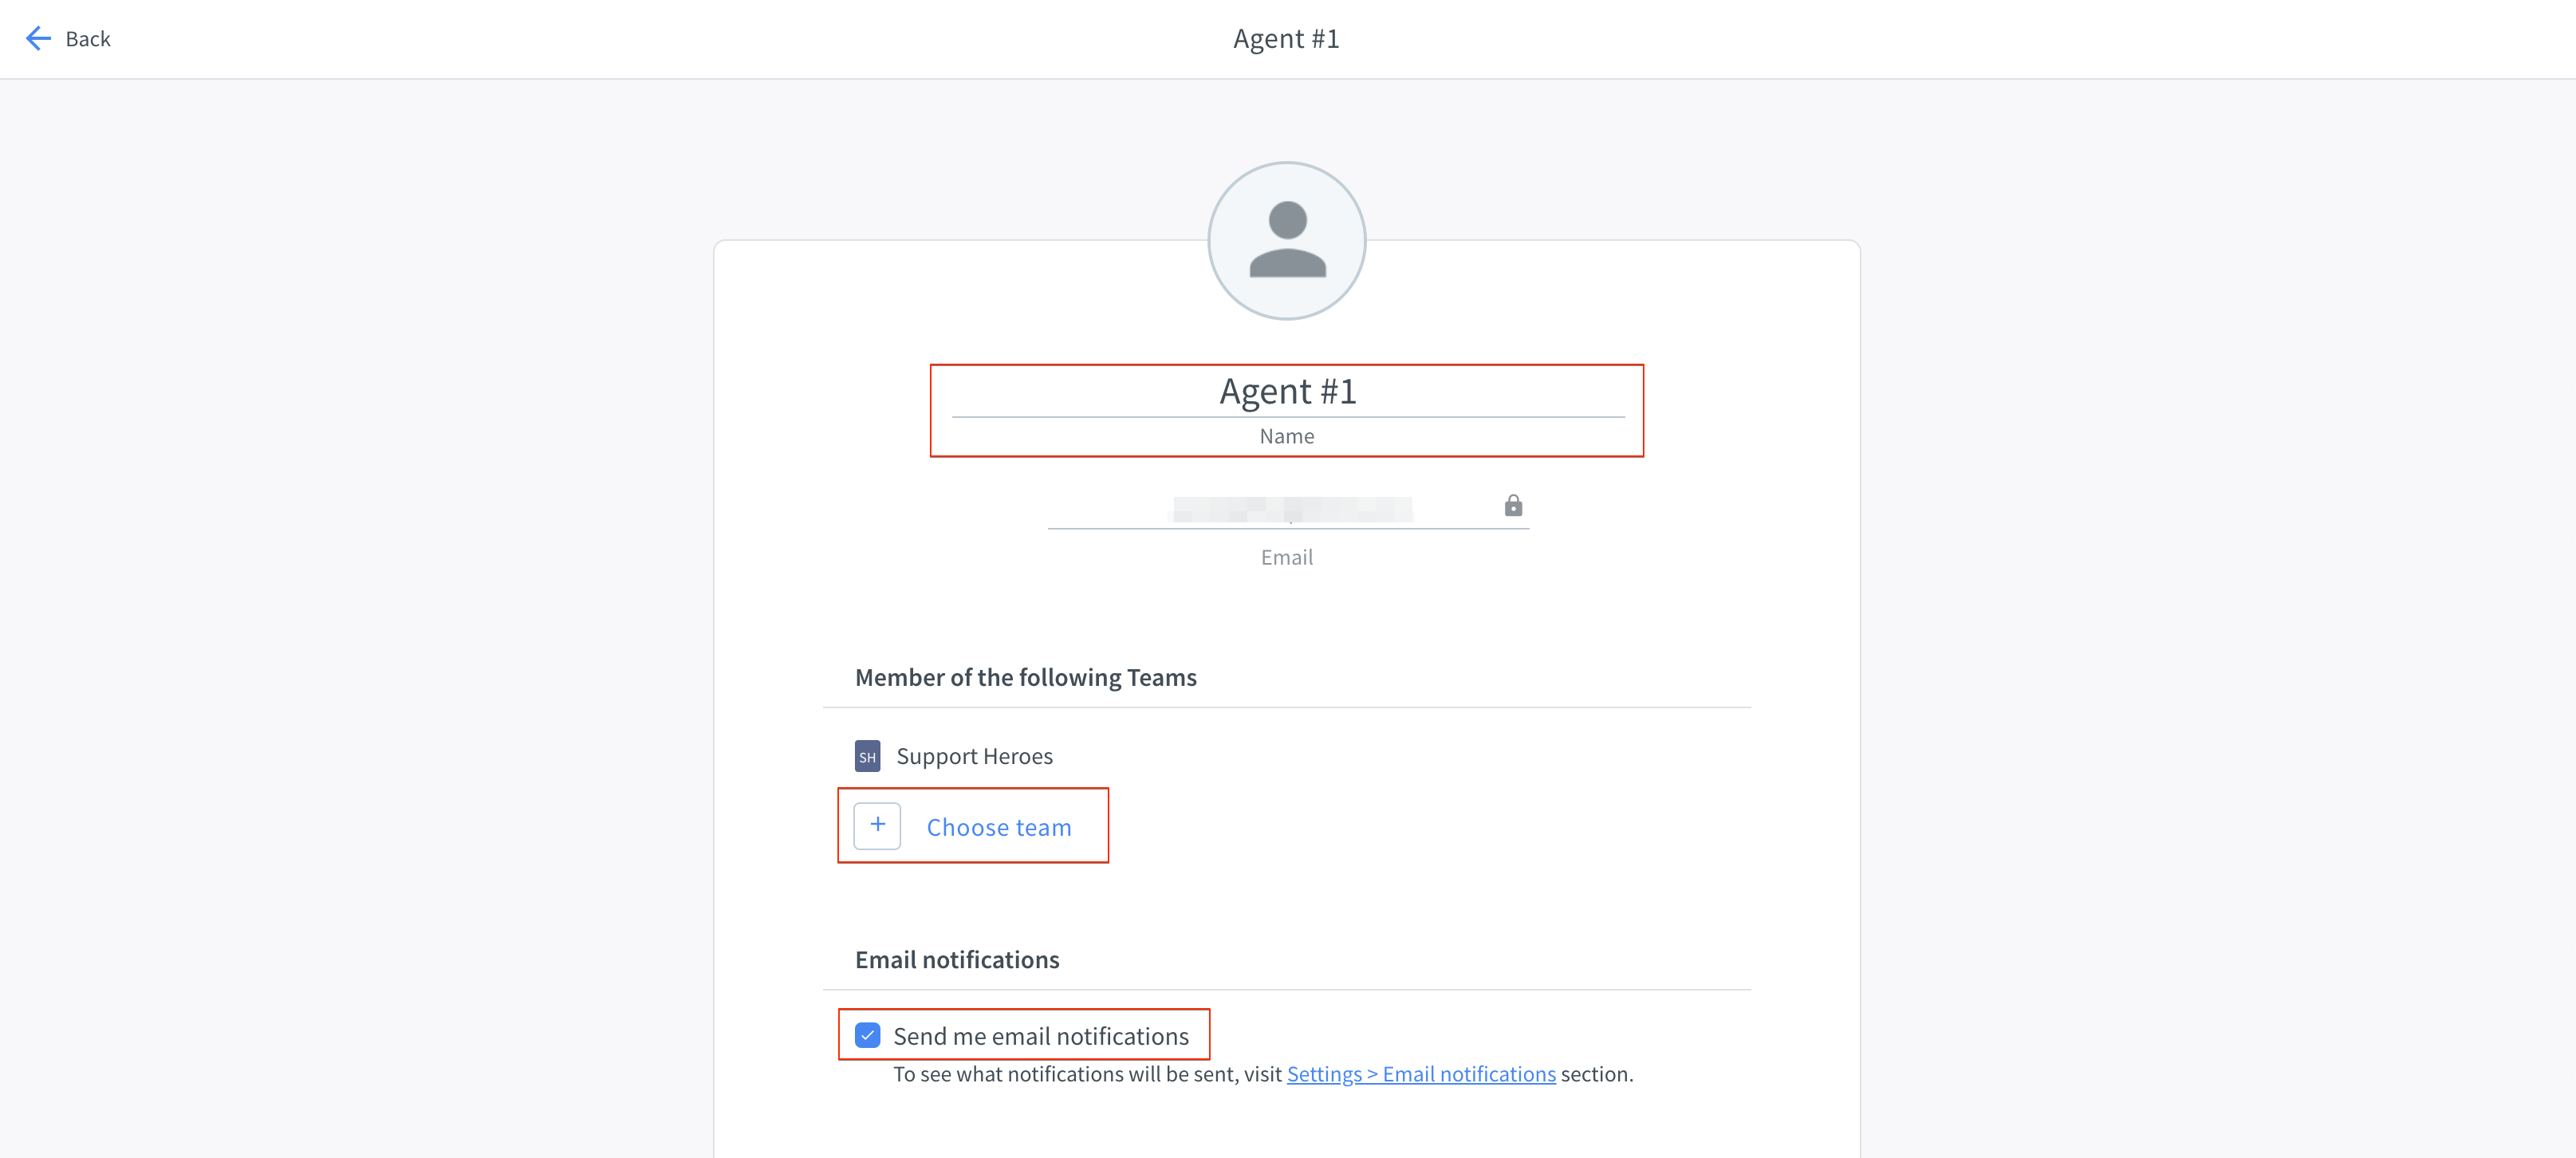
You can change the following settings:
- Name – change the agent’s display name
- Teams – assign the agent to teams
- Email notifications – enable or disable email notifications
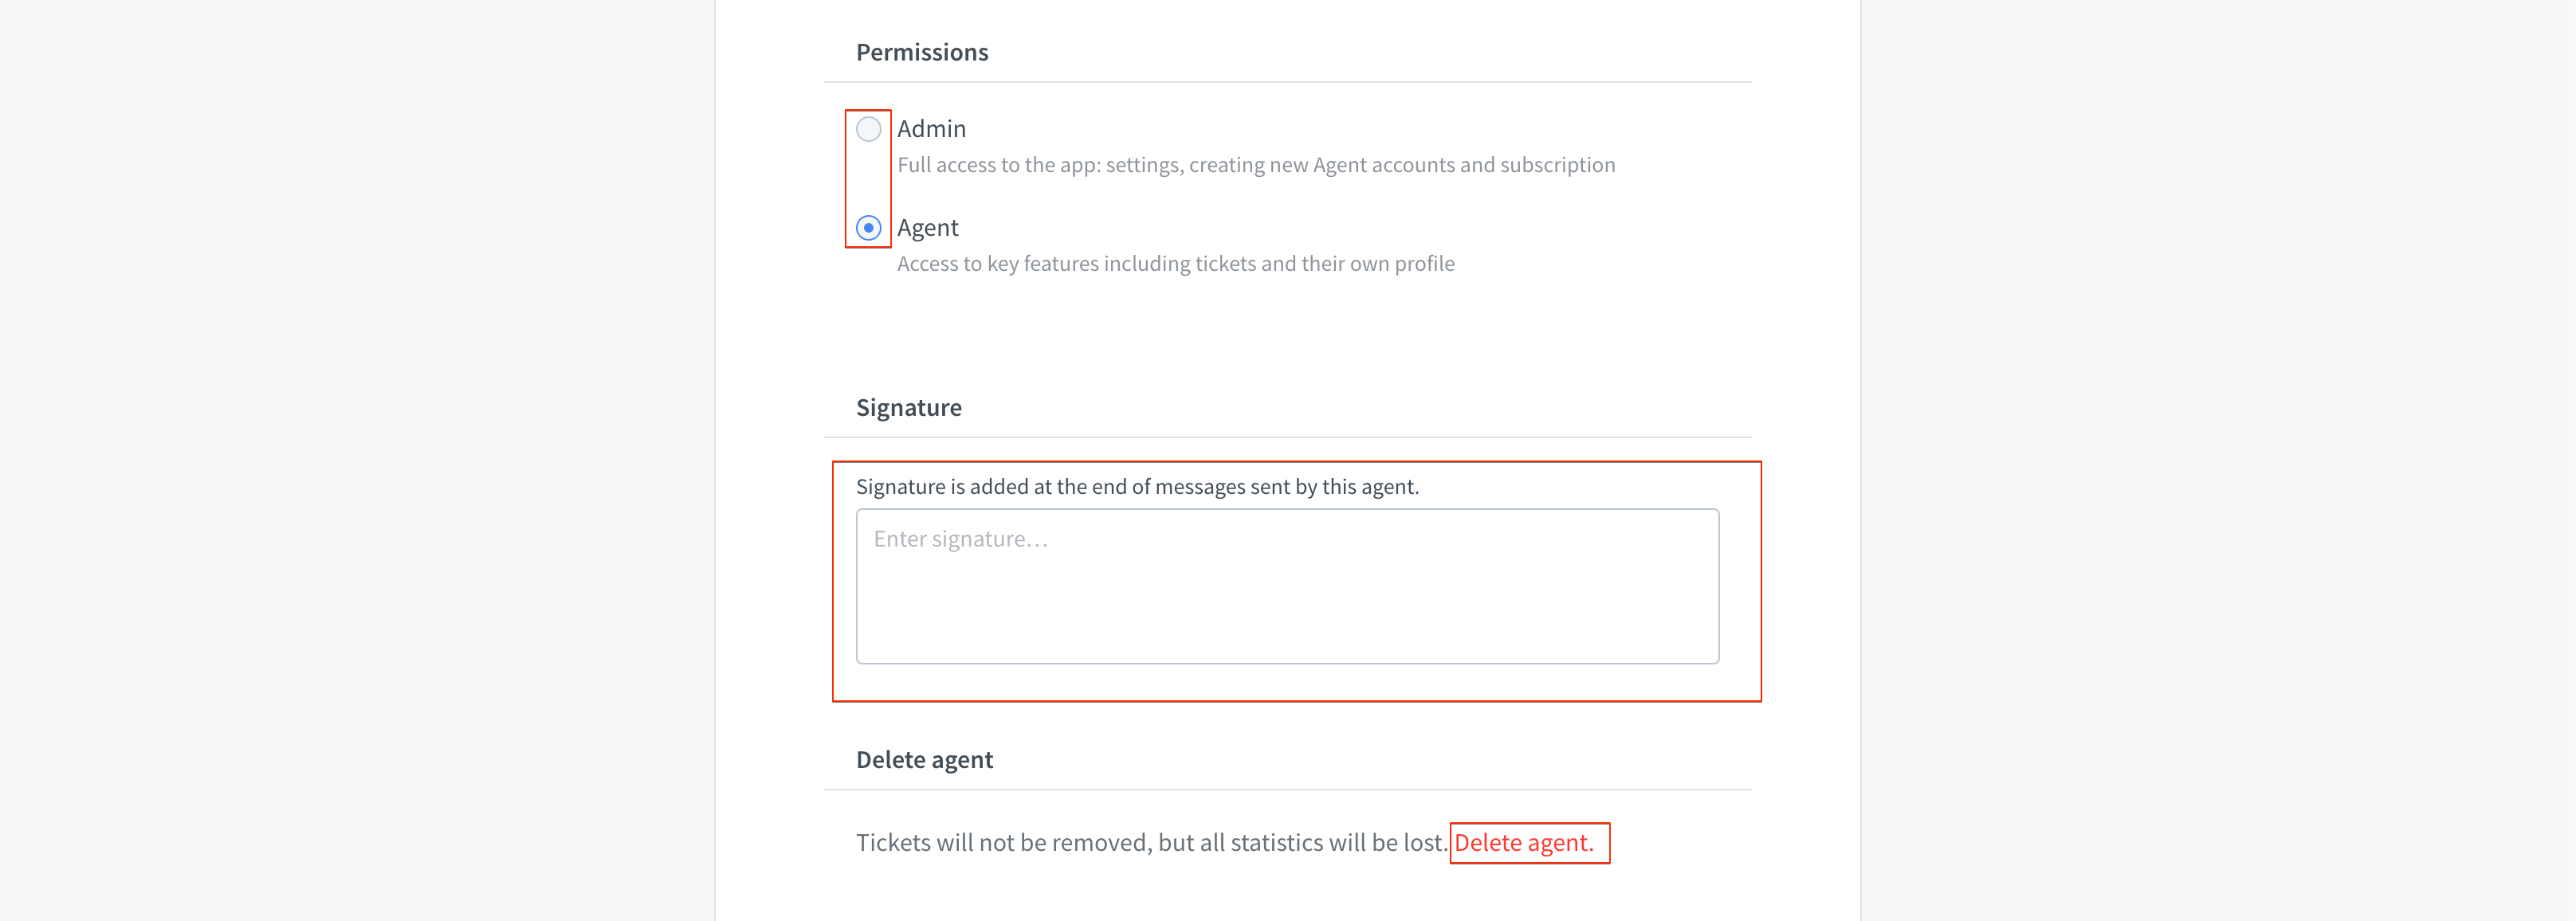
- Permissions – change agent’s role to admin to give them access to advanced settings (billing, inviting other agents)
- Signature – a signature will be added at the bottom of the agent’s messages
- Delete agent – delete the Agent’s account
When you apply the necessary changes, click “Save changes.”
