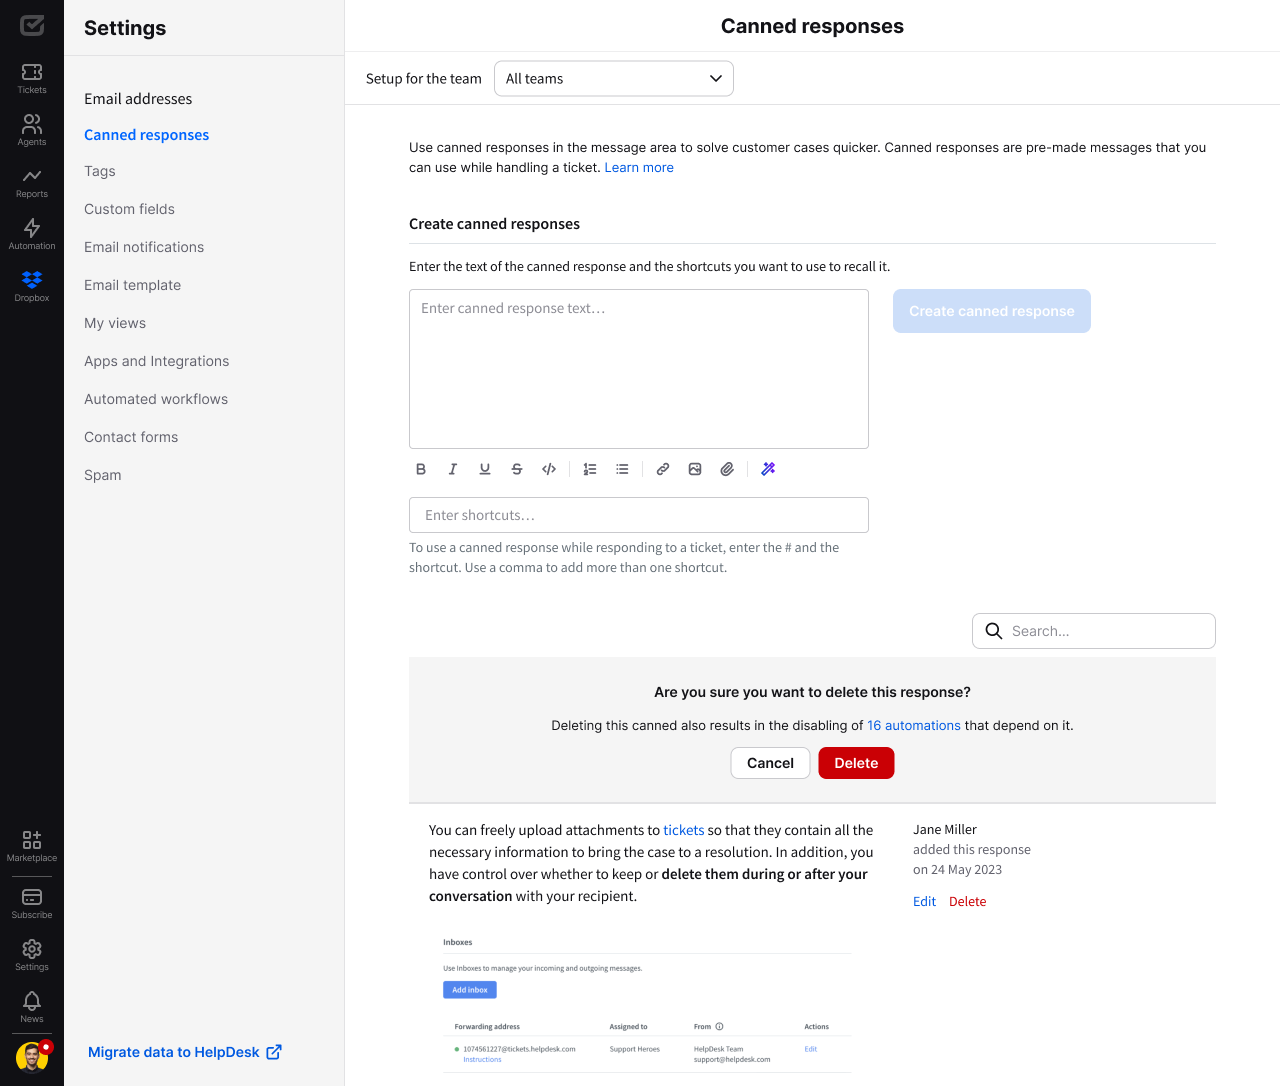
If you respond to customer messages daily, you’ve probably noticed that many of them are similar or even the same. You can create predefined answers and paste them into messages using shortcuts to speed things up.
Using canned responses in HelpDesk
To use a predefined message in a ticket in your Helpdesk account, type a hash mark (#) and enter the shortcut name, or simply select it from the list.

Learn how to use canned responses from this short how-to video:
Managing canned responses
To change canned responses, go to the “Settings” section and select the “Canned responses” category.
You can find a list of saved canned responses with their author and the date they were added. You can also edit, add new, or delete canned responses that are no longer in use.
Adding canned responses
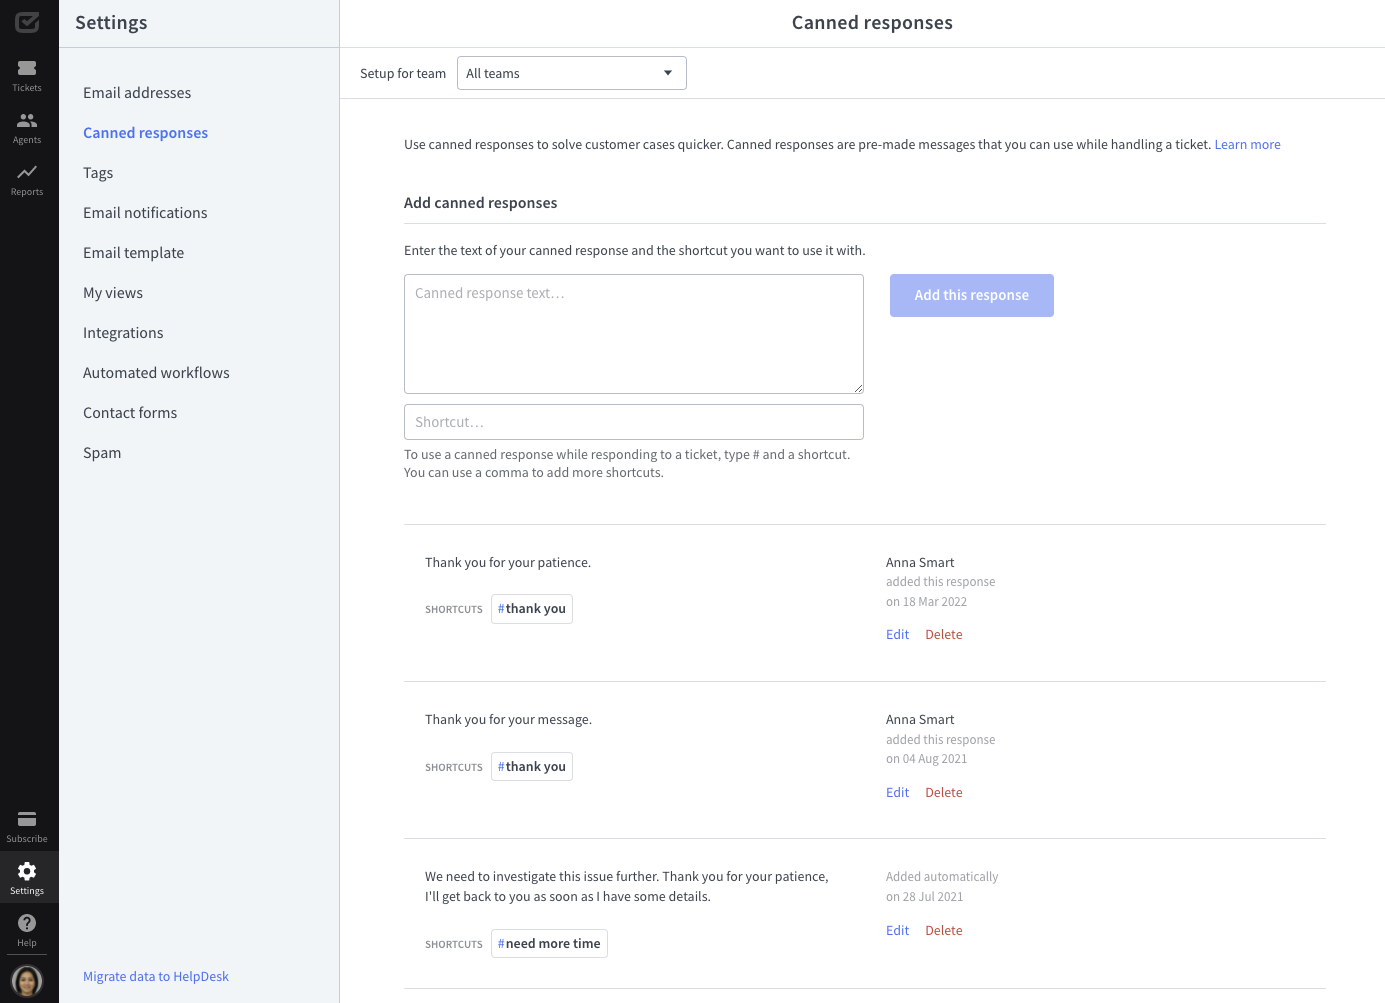
Go to the “Settings” section in your HelpDesk user panel and select the “Canned responses” category to add a canned response.
Next, enter the canned response text and the shortcut of your choice.
Once you’ve completed these two fields, click the “Add this response” button to save it, and that’s it — the canned response is ready to use in your messages.
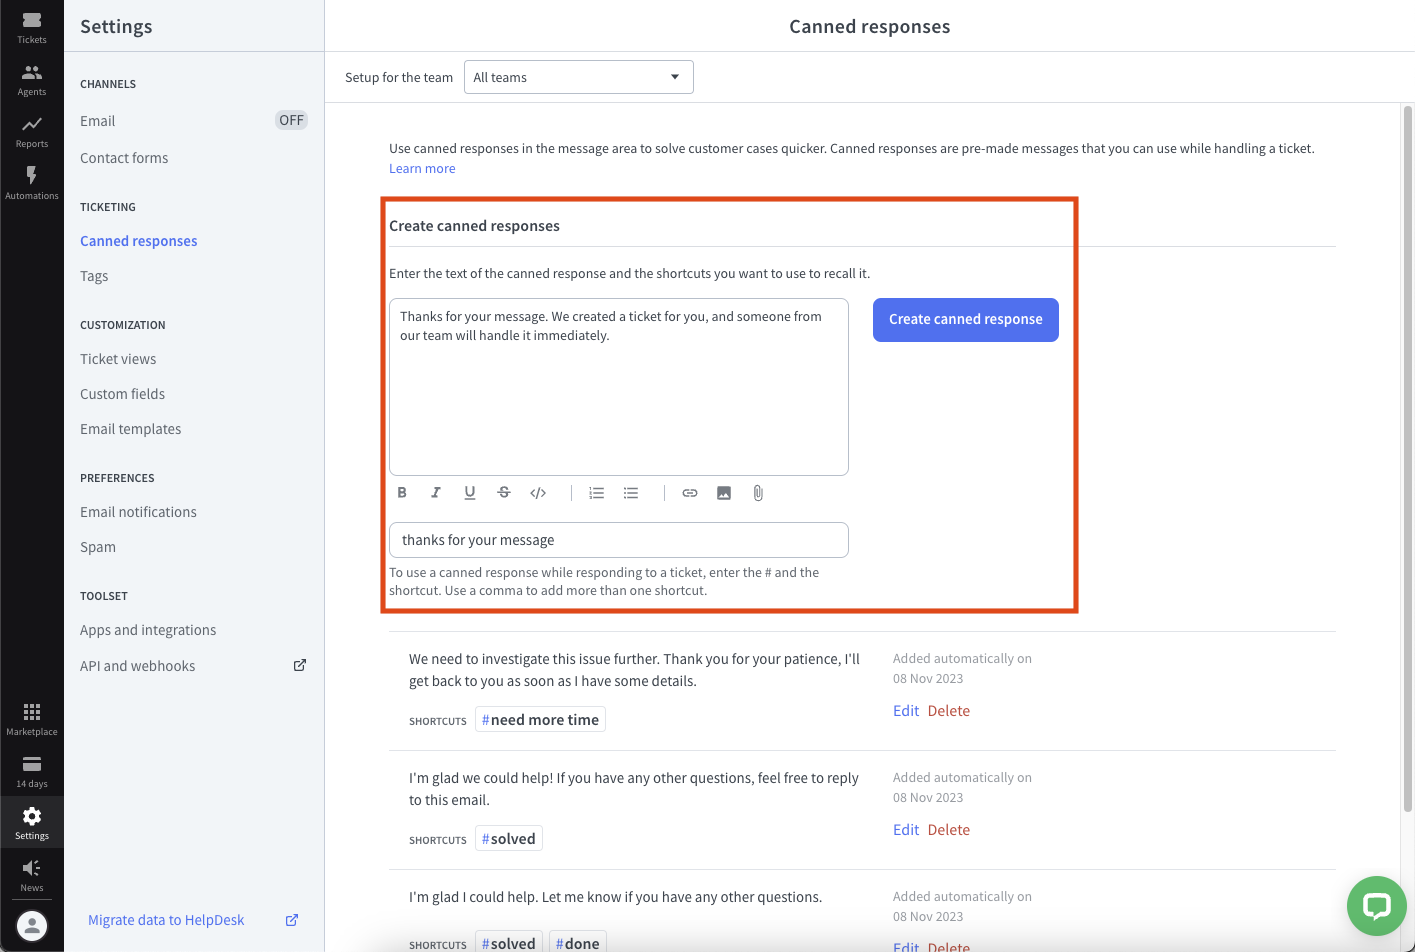
Using text formatting options in canned responses
Text formatting options aren’t just about making your canned responses look better — they’re tools for enhancing the clarity, professionalism, and effectiveness of your customer communication.
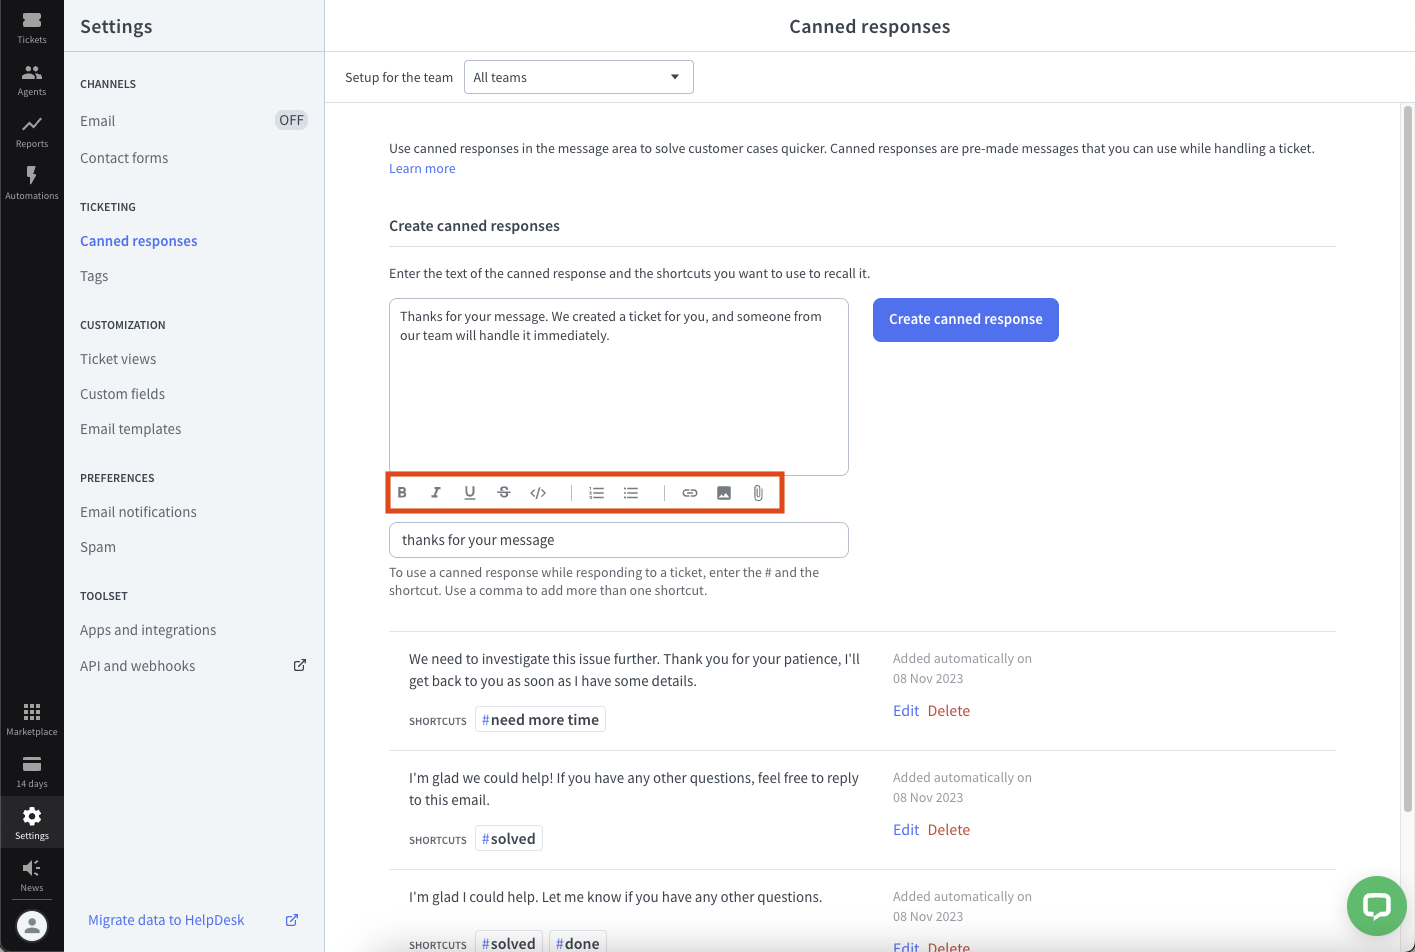
Bold, interline, underline, strikethrough
Customize your message by making text bold, italic, underlined, or with a strikethrough. This gives you the ability to tailor your message to better align with your specific purpose and intention.
Numbered list
Use numbered lists to present information in a structured and sequential manner. It’s perfect for outlining steps or procedures.
Bulleted list
Bullet points are great for creating easy-to-read lists or highlighting key points without a specific order.
Code
If you need to share code snippets or technical information, our code formatting option ensures that your code is presented clearly and uniformly.
Links
Add helpful links to your canned responses, whether they point to internal or external resources. This is a fantastic way to provide additional information or references to your customers.
Images
Insert useful images and screenshots into your canned responses to make your explanations more visual and easier to understand.
Attachments
For more comprehensive solutions, you can upload the necessary attachments to solve your customer’s case. Supported attachment formats include PDF, JPG, DOC, XLS, CSV, or ZIP. You can upload files up to 10 MB in size to send them in the conversation.
Using variables in canned responses
You can use variables in your HelpDesk canned responses. We support the following variables:
- Requester name
- Requester email
- Agent name
- Agent email
- Ticket Short ID
To use them, just click the “Add variable” button, and they’ll show up in the canned response text area.

When you use canned responses in tickets, variables are always automatically replaced in the ticket if proper values are available.


Using LiveChat variables in HelpDesk canned responses
When you import canned responses from your LiveChat account to HelpDesk, you can use several variables. We support the following variables from LiveChat:
- %ticket.requesterName%
- %ticket.requesterEmail%
- %ticket.agentName%
- %ticket.agentEmail%
However, when importing data from LiveChat to HelpDesk, the %var_name% variable format available in LiveChat will be replaced by the {{var_name}} variable format available in HelpDesk.
Editing canned responses
To edit your canned response, click the “Edit” button, make the necessary changes, and click “Save.”


Deleting canned responses
If you no longer need a particular canned response, you can delete it in your HelpDesk account, by following these steps:
- Go to the “Settings” section, select the “Canned responses” category, and find the response you want to delete.
- Hover your cursor over it and click “Delete.”
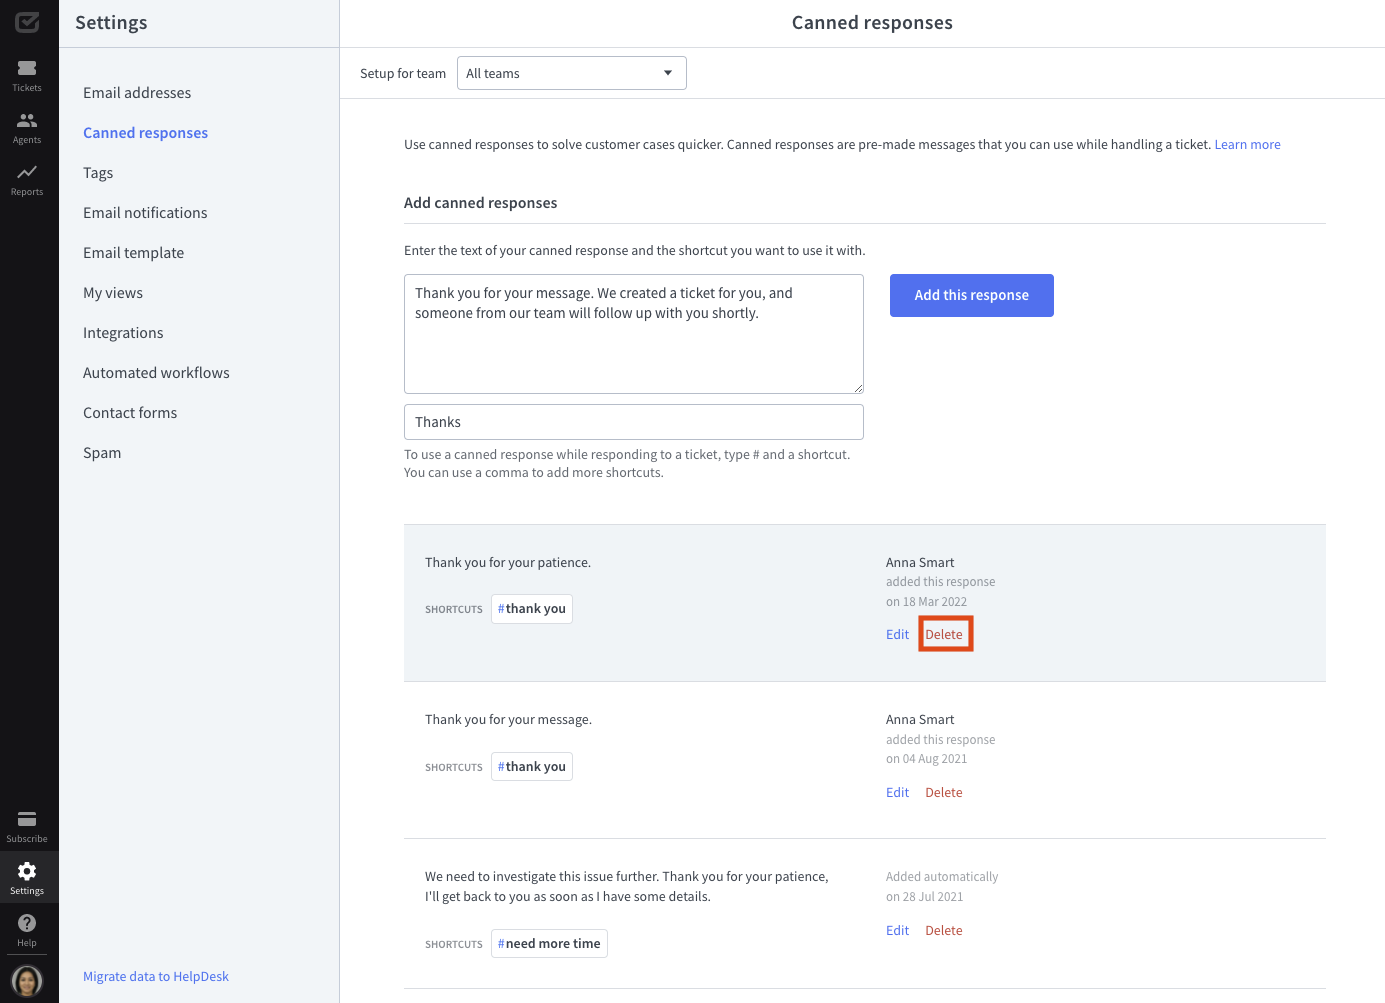
Then, click the “Delete” button to confirm the action.

