Video tutorial for creating and adding tags
Tags help you organize and categorize the messages in HelpDesk. Tags are labels attached to the tickets that help you identify the contents of a message.
This article shows you how to create tags and add them to your tickets.
Adding tags allows you to organize your tickets according to the criteria of your choice, e.g., department in charge (sales, support, etc.) or the importance of a message (VIP, urgent).
You can create as many tags as you wish.
Creating tags
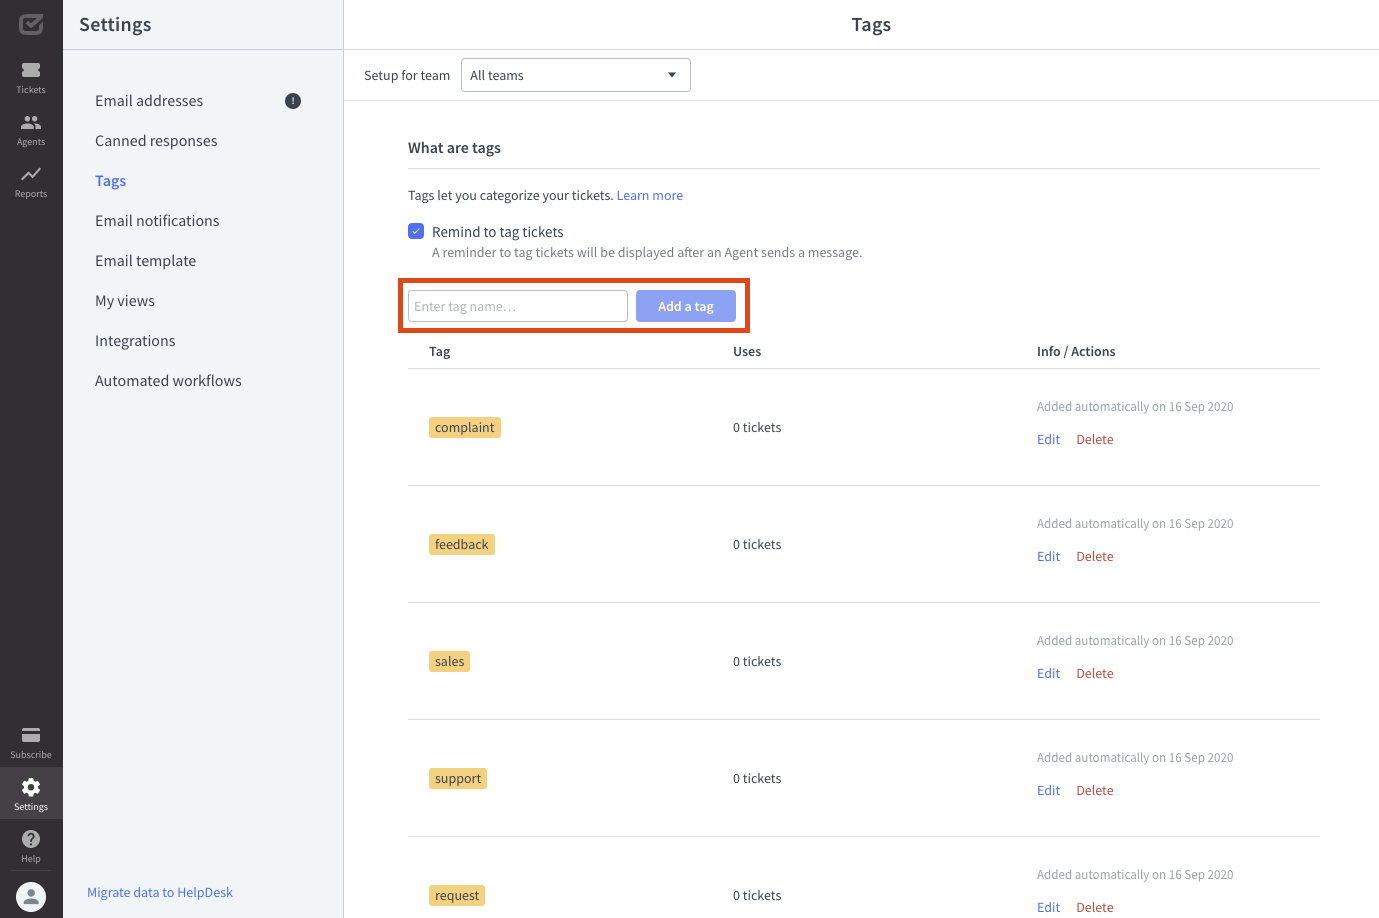
- Go to Settings -> Tags
- Enter the tag name and click the ‘Add a tag’ button to save. Your new tag is ready to be used with your tickets.

Adding tags to tickets
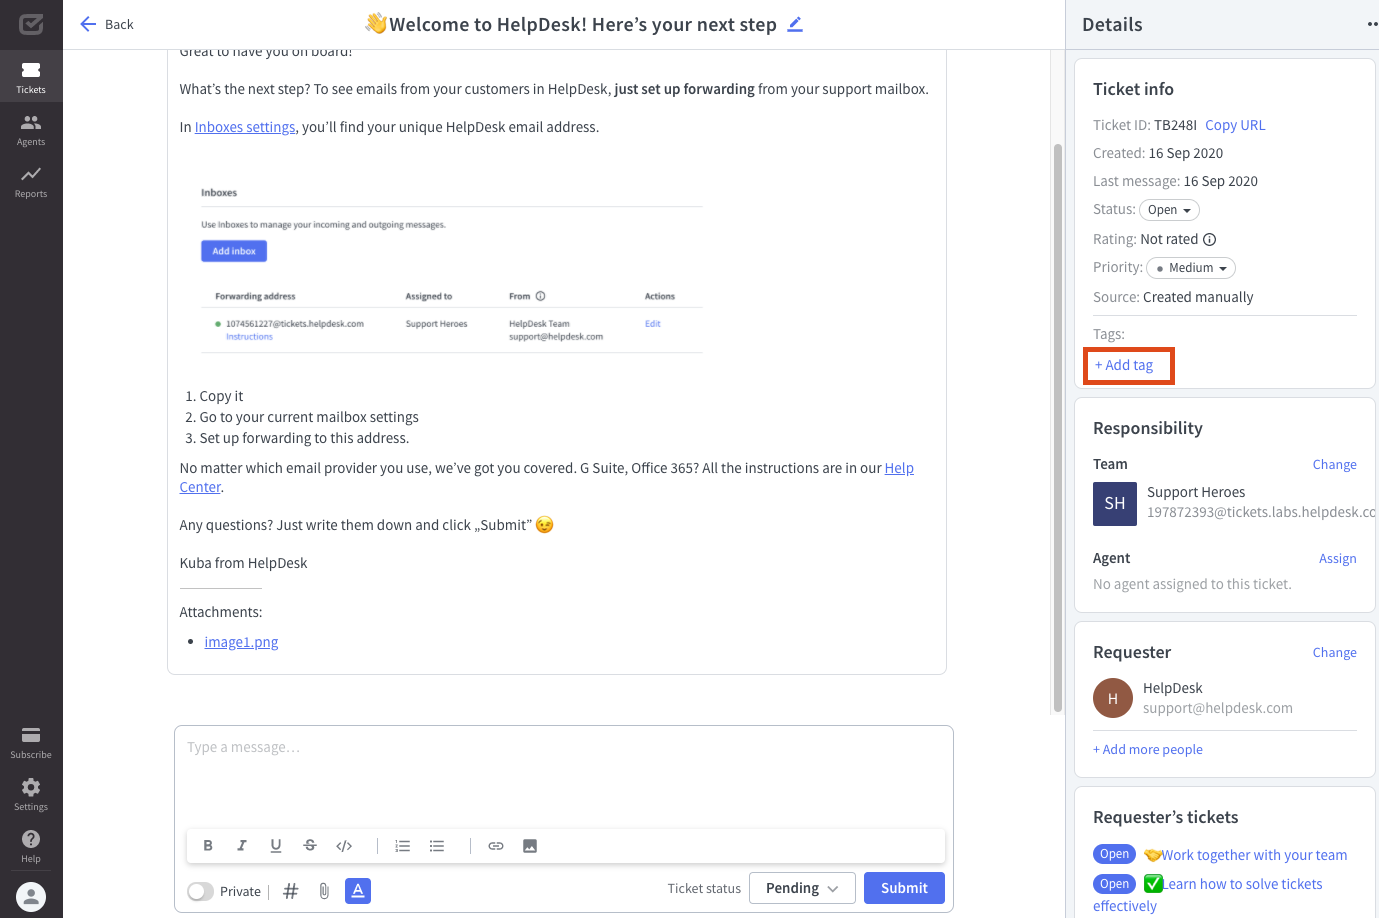
In HelpDesk, you can easily add or remove tags. When you open a ticket, you will see all the tags assigned to it in the ‘Details’ section on the right.

To add a new tag, click the ‘+ add tag’ button and choose a tag. You can also type the tag name in the blank text field.
Deleting tags
To remove a tag, click the ‘X’ button next to the tag name.
Tag reminder
Tag reminder will remind you to add a tag to your ticket. It’s activated after sending a message in a ticket without a tag.

To enable or disable the tag reminder, go to Settings and choose ‘Tags’ category.

