Ticket priorities are a great way to establish your priority support system. Your team members can use them to categorize issues and add adequate value to them. It has never been so easy to sort out your incoming customers’ cases.
Available ticket priority levels
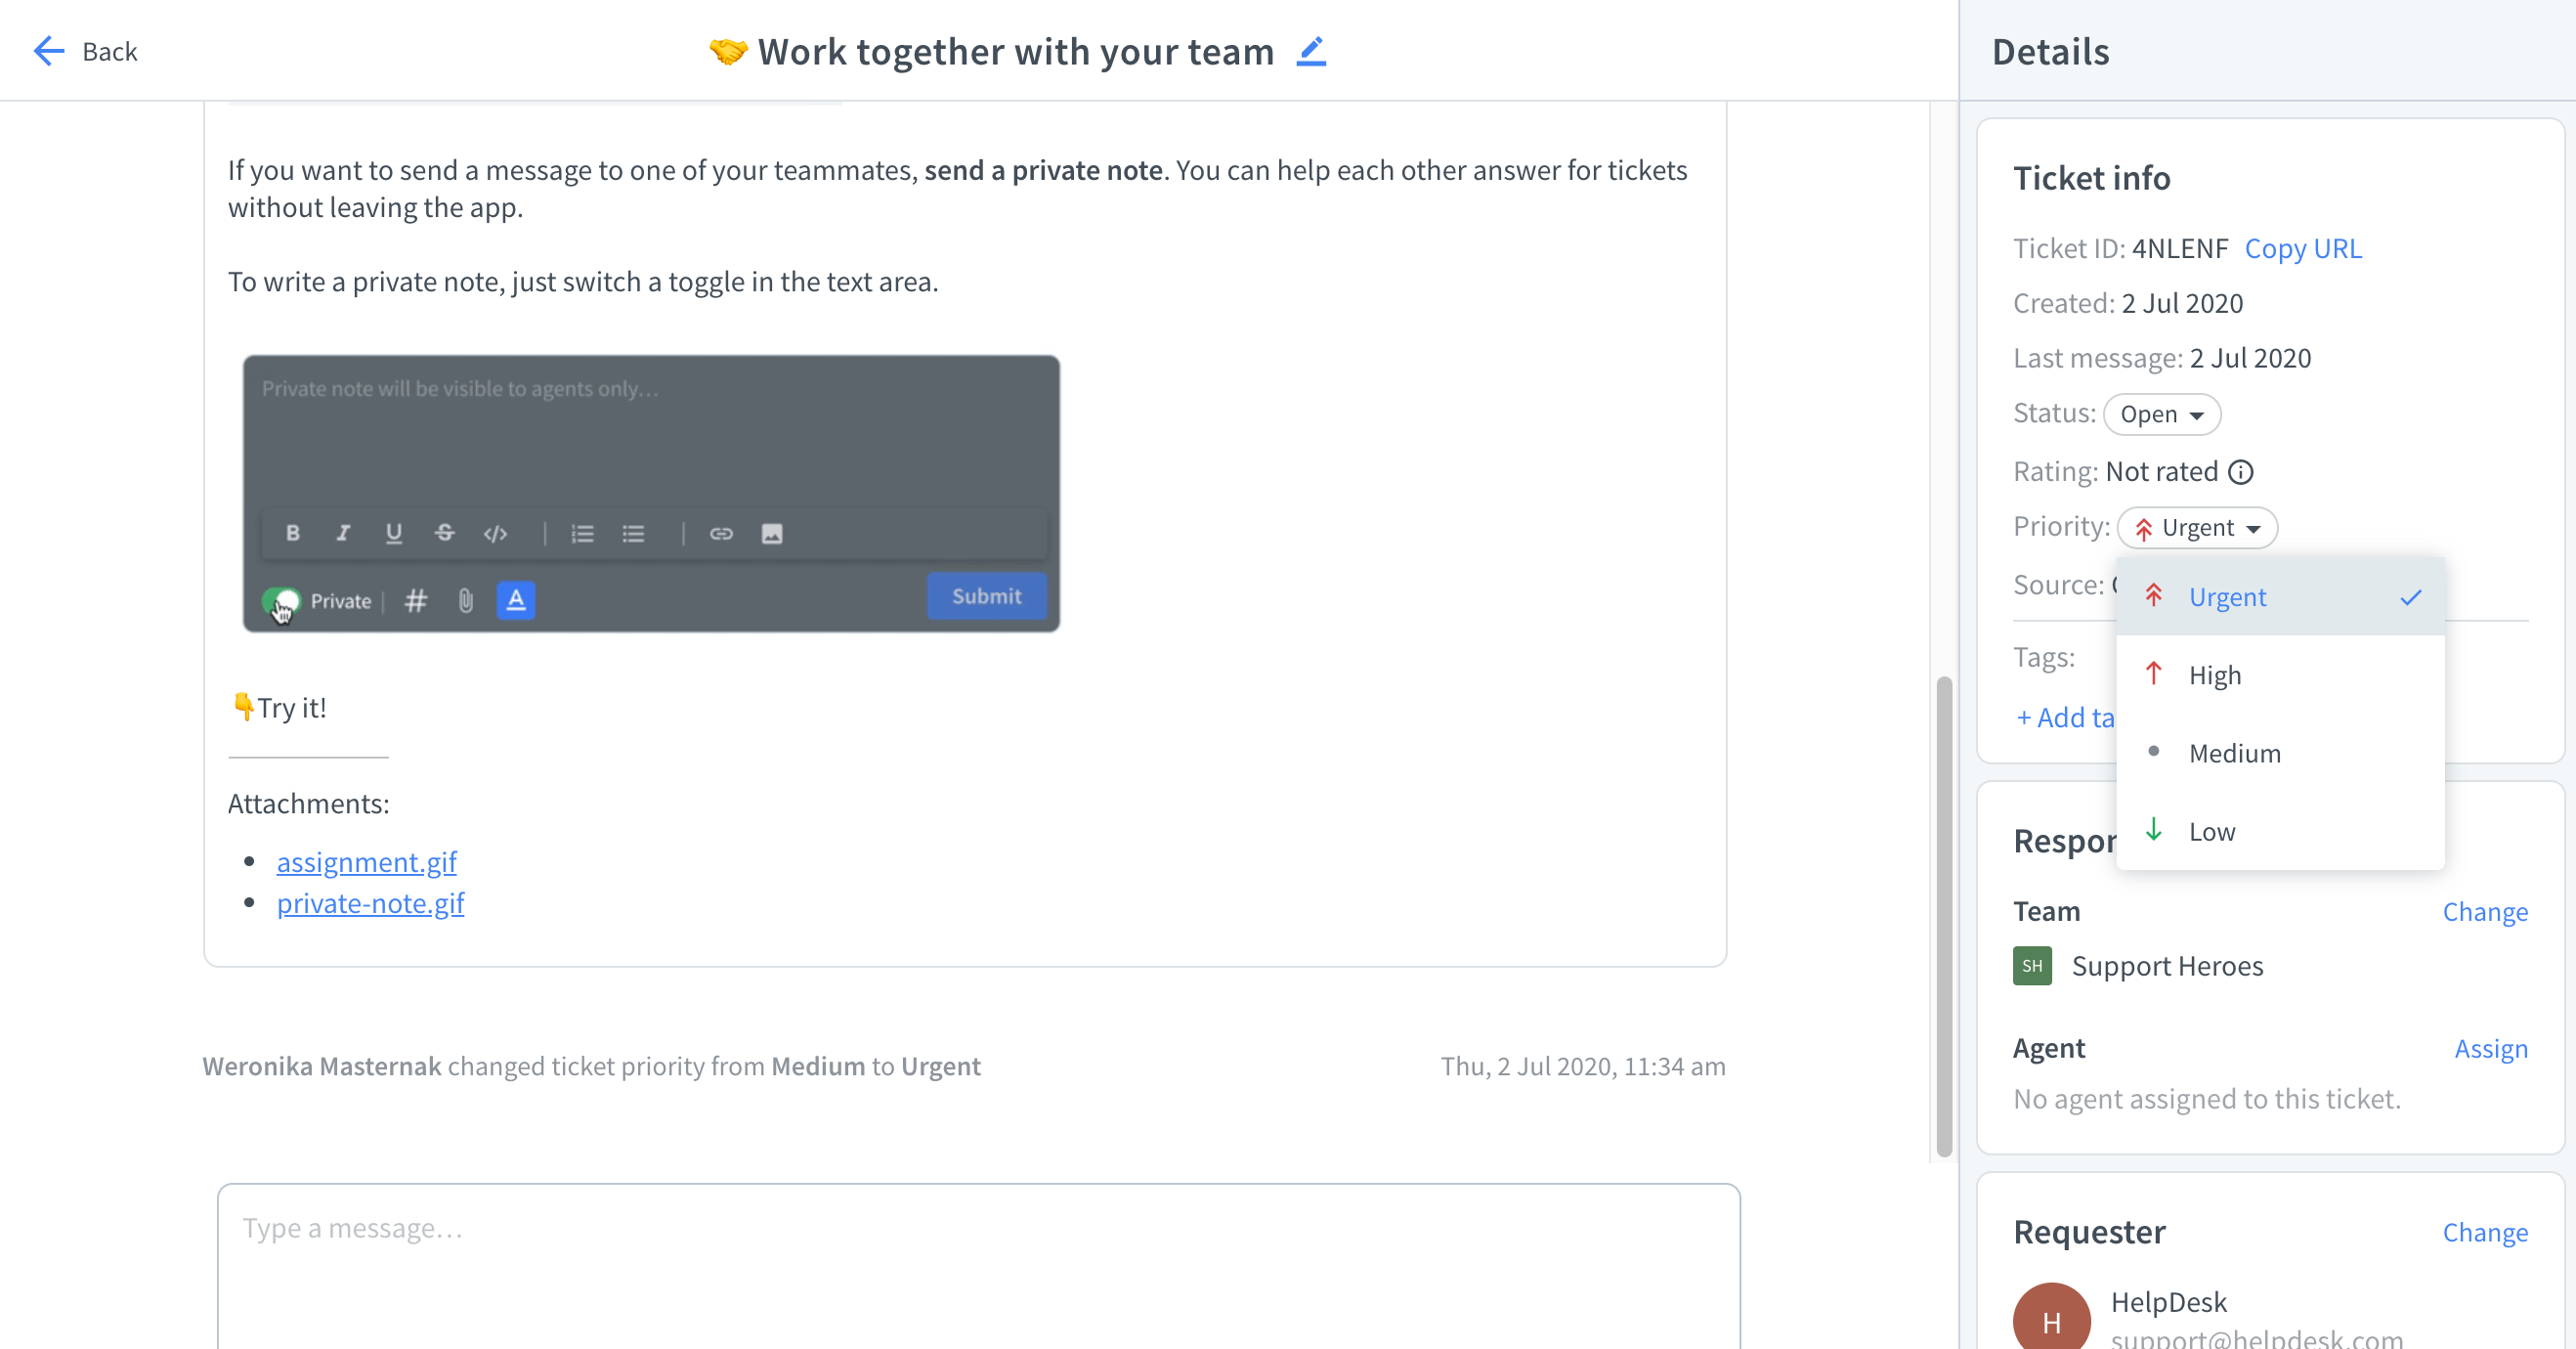
In HelpDesk, there are four priority levels: Urgent, High, Medium, and Low, available in all plans.
Use them to differentiate incoming requests, and to make it easier for you to decide what to focus on first. The set priority level of a ticket is invisible to your customers.
Check how you can use filters to select tickets with the desired priority value. After filtering out the necessary data, you can save your view thanks to ‘Save view’ button. It gives you quick access to the tickets with the chosen priority level.

If you’re expected to maintain the SLA policy, ticket priorities will work perfectly here. By prioritising your ticket, you can get even better results when it comes to response time and ticket resolution time.
Setting a priority in the new ticket
If you create a new ticket manually, you can set the priority from the drop-down list.

Change of priority in the existing ticket
There can be many customer requests, and each of them is important from a business point of view, but not all of them should be urgent. That’s why you can change the ticket’s priority level at any time.
You can change the priority of the ticket from the Ticket list and in the ticket Details.
Changing the ticket priority from the Ticket list
Select a ticket from the Ticket list, click on the menu on the right, and change the priority.

Changing the ticket priority in Ticket info in Details section
Open the ticket from the Ticket list to see additional information. Go to Details section and change the priority in Ticket info.

